Difference between revisions of "Bin Picking Tutorial: Setting up Photoneo Bin Picking Studio with KAWASAKI robots"
(Created page with "== 1. Prerequisities == Photoneo KAWASAKI Interface is compatible with E series controllers. == 2. KAWASAKI Controller setup == The following tutorial gives a step by ste...") |
|||
| Line 10: | Line 10: | ||
Turn on the E series Controller, wait for the system to boot, open the '''Menu screen''' and select the '''Aux Function''' option: | Turn on the E series Controller, wait for the system to boot, open the '''Menu screen''' and select the '''Aux Function''' option: | ||
| + | |||
[[File: Kawa IP step 0.png]] | [[File: Kawa IP step 0.png]] | ||
| − | In Aux function menu select '''System''' option: | + | |
| + | In '''Aux function''' menu select '''System''' option: | ||
| + | |||
[[File: Kawa IP step 1.png]] | [[File: Kawa IP step 1.png]] | ||
| + | |||
Select '''Network Settings''': | Select '''Network Settings''': | ||
| + | |||
[[File: Kawa IP step 2.png]] | [[File: Kawa IP step 2.png]] | ||
| + | |||
Configure network settings of Port 1 and confirm by clicking '''Enter''' Button. '''Port 1''' will be utilized for communication with Binpicking Studio: | Configure network settings of Port 1 and confirm by clicking '''Enter''' Button. '''Port 1''' will be utilized for communication with Binpicking Studio: | ||
| + | |||
[[File:Kawa IP step 3.png]] | [[File:Kawa IP step 3.png]] | ||
| + | |||
In case you want to utilize KRTerm for transferring programs between PC and Robot controller you also need to configure Port 2. Click '''Next Page''' configure network settings and confirm by '''Enter''' button. | In case you want to utilize KRTerm for transferring programs between PC and Robot controller you also need to configure Port 2. Click '''Next Page''' configure network settings and confirm by '''Enter''' button. | ||
| + | |||
[[File:Kawa IP step 4.png]] | [[File:Kawa IP step 4.png]] | ||
| + | |||
Restart robot controller to apply network settings. | Restart robot controller to apply network settings. | ||
| Line 41: | Line 51: | ||
- '''main_application.pg''' | - '''main_application.pg''' | ||
| − | === 3. | + | === 3.1 Transfering .pg files to robot controller === |
| − | The first step in the installation of Photoneo KAWASAKI Interface is to copy | + | The first step in the installation of Photoneo KAWASAKI Interface is to copy .pg files from Photoneo KAWASAKI Module Archive which you received with Photoneo BP Studio to the Robot Controller. |
You can copy the files directly from the USB stick using the Pendant, however the most convenient method to transfer the .pg files is to use the [http://ftp.kawasakirobot.de/files/public/Software/KRTerm/ KRTerm] tool. | You can copy the files directly from the USB stick using the Pendant, however the most convenient method to transfer the .pg files is to use the [http://ftp.kawasakirobot.de/files/public/Software/KRTerm/ KRTerm] tool. | ||
| Line 50: | Line 60: | ||
Open KRTerm and select '''COM''' -> '''Options''' to add new robot controller: | Open KRTerm and select '''COM''' -> '''Options''' to add new robot controller: | ||
| + | |||
[[File:Kawa KRTerm step 0.png]] | [[File:Kawa KRTerm step 0.png]] | ||
| + | |||
Type IP address of Port 2 as configured in the pendant in previous step: | Type IP address of Port 2 as configured in the pendant in previous step: | ||
| + | |||
[[File:Kawa KRTerm step 1.png]] | [[File:Kawa KRTerm step 1.png]] | ||
| − | Make sure that you are able to ping | + | |
| + | Click '''File''' -> '''Set Current Folder''' and set path to the folder where you keep .pg files | ||
| + | |||
| + | |||
| + | [[File:Kawa KRTerm step 3.png]] | ||
| + | |||
| + | |||
| + | We are now ready to connect to the robot. Make sure that you are able to ping robot controller from your PC and click on '''Connect''' button. If connection was established properly you should see login prompt as shown in the figure below: | ||
| + | |||
[[File:Kawa KRTerm step 2.png]] | [[File:Kawa KRTerm step 2.png]] | ||
| − | Use password '''as''' to log in. Now your are able to issue commands directly to robot controller. | + | |
| + | Use password '''as''' to log in. Now your are able to issue commands directly to robot controller. In order to load .pg files to robot controller use LOAD command as shown in the figure below: | ||
| + | |||
| + | |||
| + | [[File:Kawa KRTerm step 4.png]] | ||
| + | |||
| + | |||
| + | Use '''LOAD''' command to upload all three '''.pg files''' of Photoneo KAWASAKI interface. | ||
| + | |||
| + | |||
| + | [[File:Kawa KRTerm step 5.png]] | ||
Revision as of 13:55, 31 May 2018
Contents
1. Prerequisities
Photoneo KAWASAKI Interface is compatible with E series controllers.
2. KAWASAKI Controller setup
The following tutorial gives a step by step guide of how to configure your KAWASAKI E-series controller and install all necessary .pg files you will need to get the robot interface for Photoneo Binpicking Studio up and running.
2.1 Network configuration
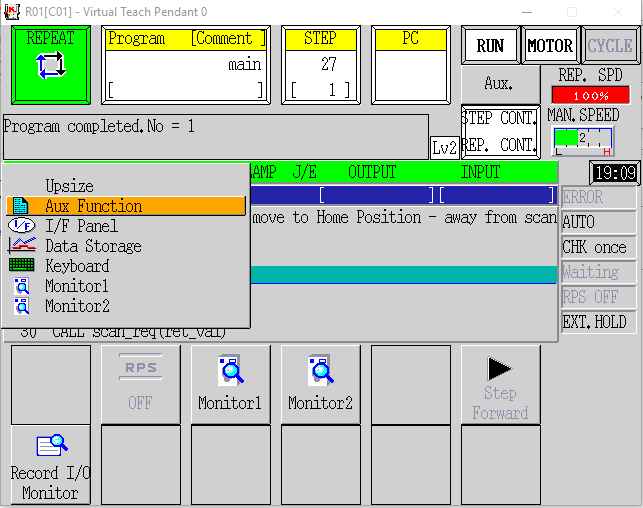
Turn on the E series Controller, wait for the system to boot, open the Menu screen and select the Aux Function option:
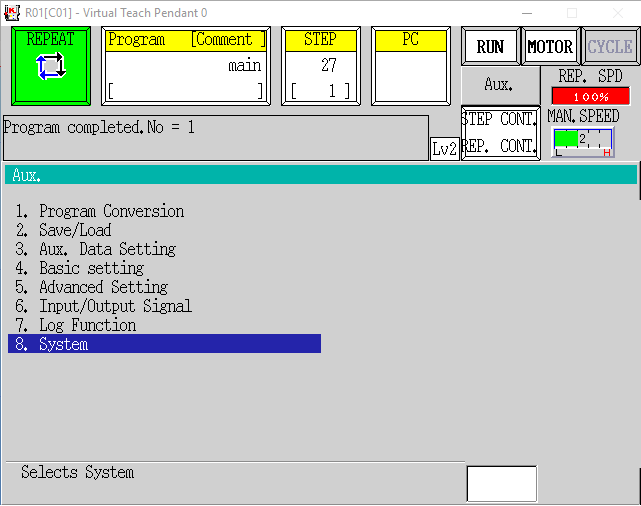
In Aux function menu select System option:
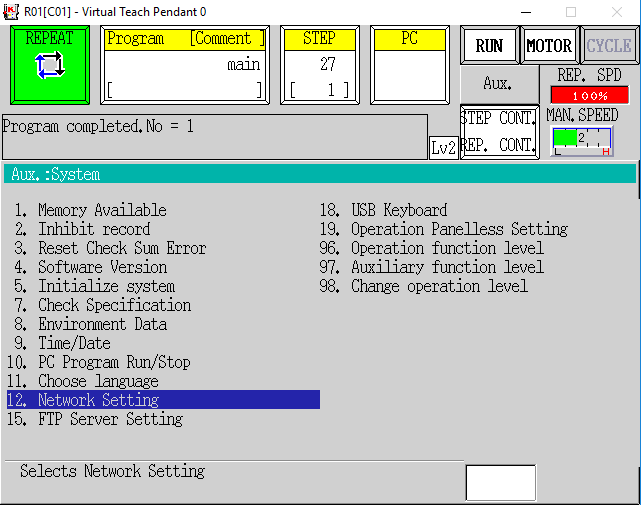
Select Network Settings:
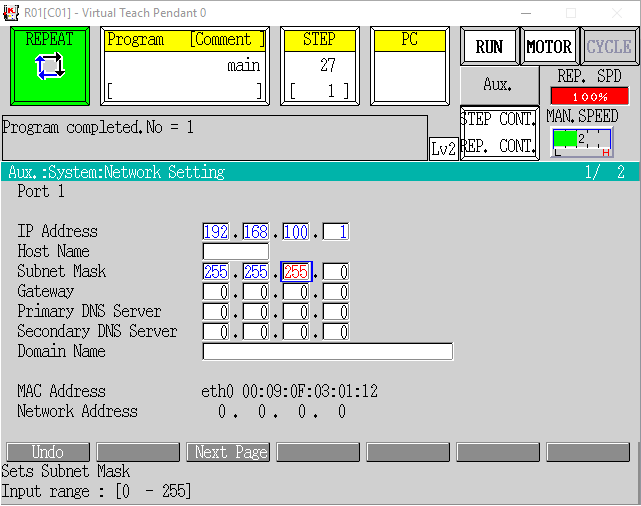
Configure network settings of Port 1 and confirm by clicking Enter Button. Port 1 will be utilized for communication with Binpicking Studio:
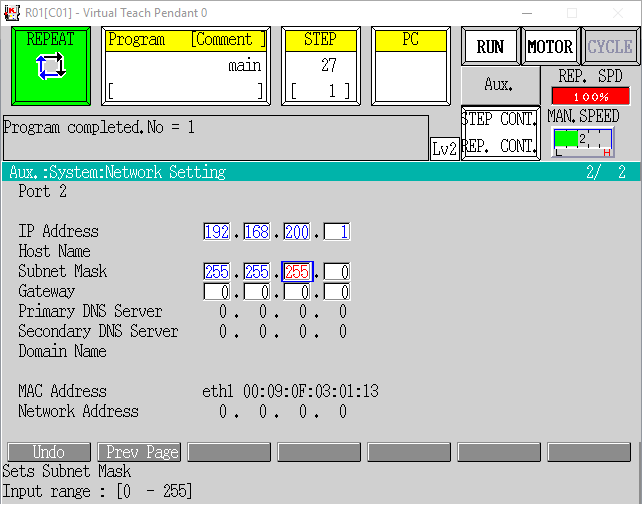
In case you want to utilize KRTerm for transferring programs between PC and Robot controller you also need to configure Port 2. Click Next Page configure network settings and confirm by Enter button.
Restart robot controller to apply network settings.
3. AS language
Photoneo KAWASAKI interface consists of three .pg files
- photoneo_common.pg
- customer_definitions.pg
- main_application.pg
3.1 Transfering .pg files to robot controller
The first step in the installation of Photoneo KAWASAKI Interface is to copy .pg files from Photoneo KAWASAKI Module Archive which you received with Photoneo BP Studio to the Robot Controller.
You can copy the files directly from the USB stick using the Pendant, however the most convenient method to transfer the .pg files is to use the KRTerm tool.
Make sure that Port 2 is configured for communication with your PC and they are connected to the same subnet.
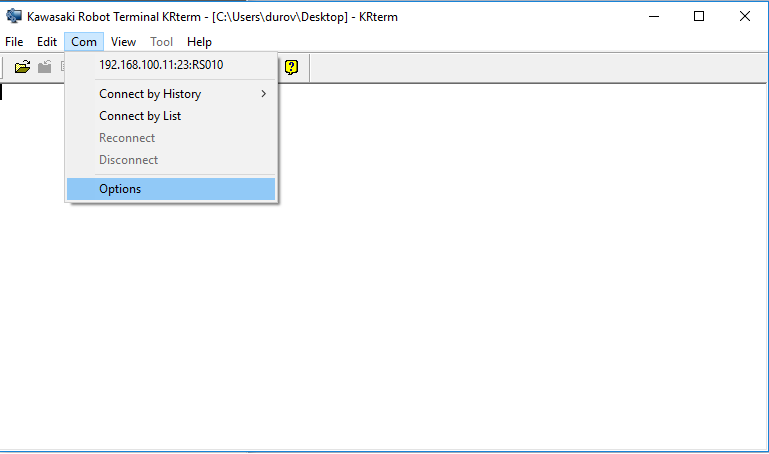
Open KRTerm and select COM -> Options to add new robot controller:
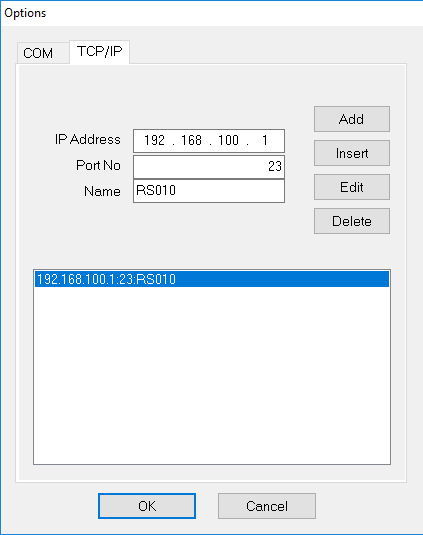
Type IP address of Port 2 as configured in the pendant in previous step:
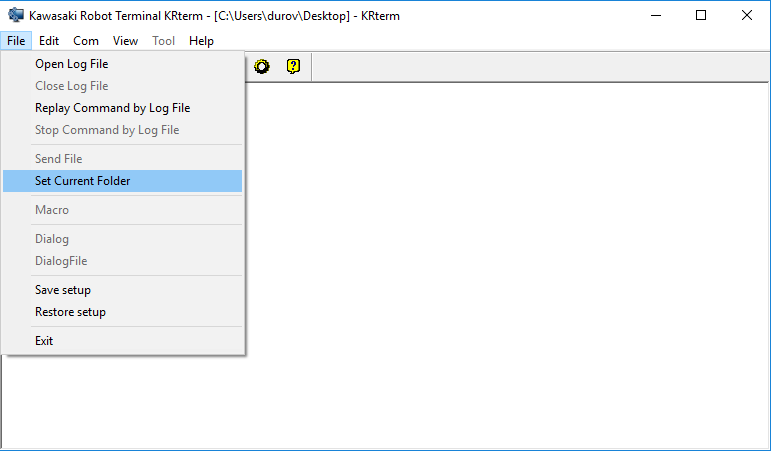
Click File -> Set Current Folder and set path to the folder where you keep .pg files
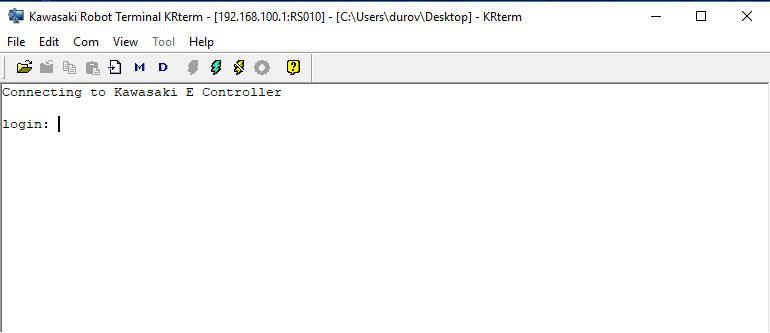
We are now ready to connect to the robot. Make sure that you are able to ping robot controller from your PC and click on Connect button. If connection was established properly you should see login prompt as shown in the figure below:
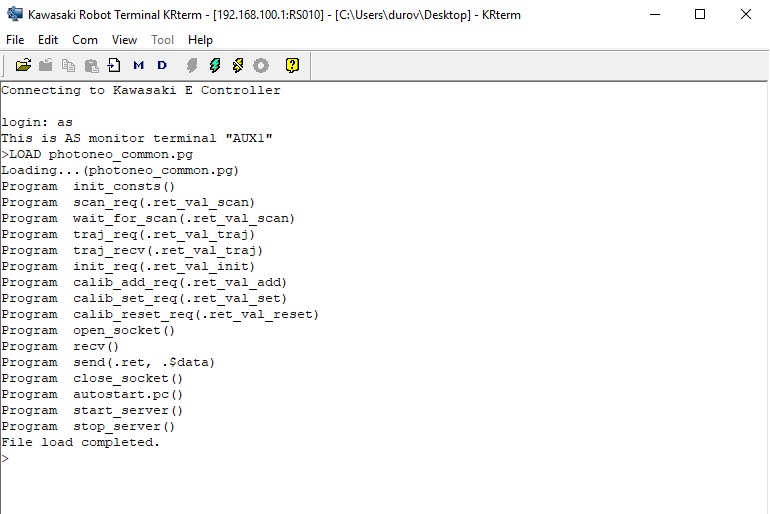
Use password as to log in. Now your are able to issue commands directly to robot controller. In order to load .pg files to robot controller use LOAD command as shown in the figure below:
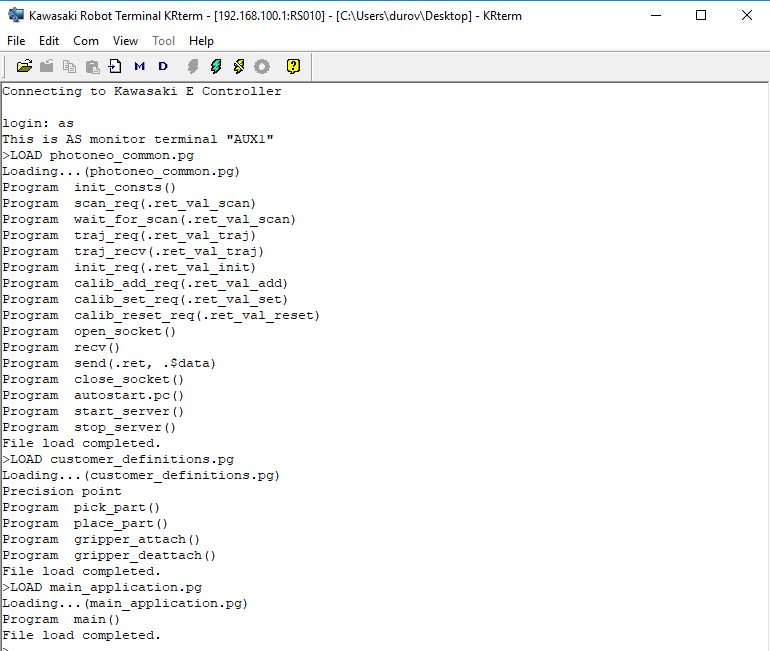
Use LOAD command to upload all three .pg files of Photoneo KAWASAKI interface.
