Difference between revisions of "Locator Tutorial: Setting up Locator to work with SIASUN robots"
| Line 11: | Line 11: | ||
| − | If your pendant is still in Chinese, select Settings tab and Switch language to '''English''' at the bottom of the page: | + | If your pendant is still in Chinese, select '''Settings''' tab and Switch language to '''English''' at the bottom of the page: |
[[File:SIASUN Locator Tutorial Language.png]] | [[File:SIASUN Locator Tutorial Language.png]] | ||
| − | |||
| − | The following tutorial gives a step by step guide of how to configure your SIASUN robot controller | + | == 2. SIASUN Controller Setup == |
| + | |||
| + | The following tutorial gives a step by step guide of how to configure your SIASUN robot controller, install all the necessary files and amend the robotic program to get the Locator up and running. | ||
This tutorial was originally written using the latest collaborative SCR5 with system version '''UI: 2.0.5, Robot: 1.0.5''' | This tutorial was originally written using the latest collaborative SCR5 with system version '''UI: 2.0.5, Robot: 1.0.5''' | ||
| Line 28: | Line 29: | ||
As a first step in commissioning, ensure that the IP address of the SIASUN controller meets your network configuration requirements | As a first step in commissioning, ensure that the IP address of the SIASUN controller meets your network configuration requirements | ||
| − | Browse to '''Settings''' -> '''IP Address''' | + | Browse to '''Settings''' -> '''IP Address''': |
| + | |||
| + | |||
| + | [[File:SIASUN Locator Tutorial IP Config Step 0.png]] | ||
| + | |||
| + | |||
| + | Select '''Static''' option and configure network settings of robot controller: | ||
| Line 63: | Line 70: | ||
[[File:SIASUN Locator Tutorial Import Step 2.png]] | [[File:SIASUN Locator Tutorial Import Step 2.png]] | ||
| + | |||
| + | |||
| + | == 4. Calibration == | ||
| + | |||
| + | Robot Camera Calibration is a crucial step in Locator configuration. Accurate calibration guarantees that the object positions will be calculated directly in Robot Base coordinates. | ||
| + | |||
| + | === 4.1 Robot - Camera Calibration === | ||
| + | |||
| + | Mount the Scanner firmly, ensure that the scene is properly captured from the final position and start the Photoneo Robot Camera Calibrator: | ||
| + | |||
| + | |||
| + | [[File: KUKA SettingUp Guide Scanner Calibration 10.png]] | ||
| + | |||
| + | |||
| + | Connect to the Scanner, select '''XYZ_Extrinsic formalism''' (Standard for SIASUN robots), adjust the '''Sphere radius''' (20 mm in case of standard ping pong ball) and set the '''Min visible''' parameter to 40%: | ||
Revision as of 22:22, 26 November 2018
It is highly recommended that users read Locator Tutorial: Introduction prior to installation of specific robot interface
Contents
1. Prerequisities
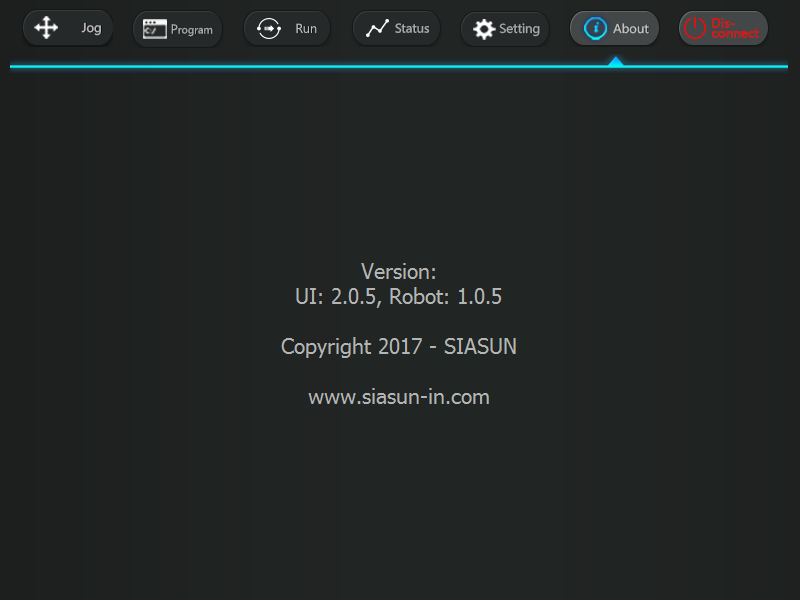
Locator SIASUN Interface is compatible with following system version: UI: 2.0.5, Robot: 1.0.5 or higher.
Check your robot system version before proceeding further, on Main Menu Click About Tab:
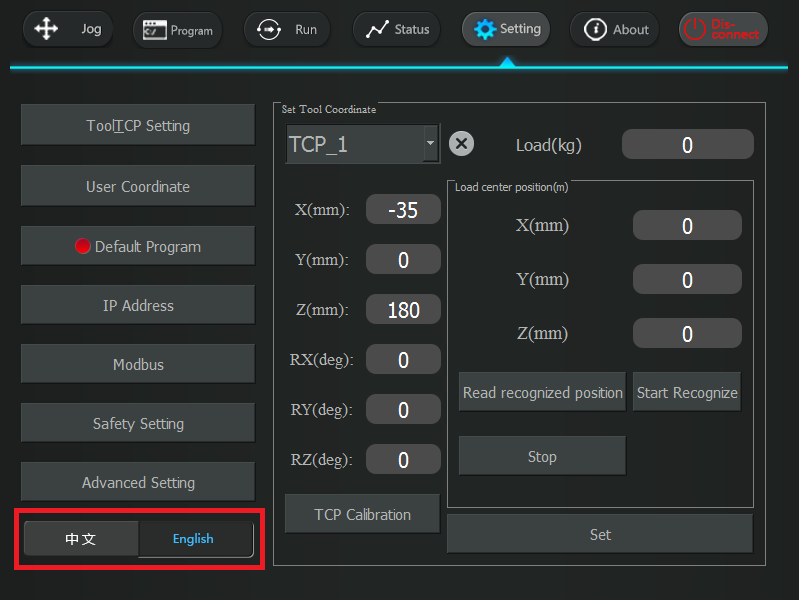
If your pendant is still in Chinese, select Settings tab and Switch language to English at the bottom of the page:
2. SIASUN Controller Setup
The following tutorial gives a step by step guide of how to configure your SIASUN robot controller, install all the necessary files and amend the robotic program to get the Locator up and running.
This tutorial was originally written using the latest collaborative SCR5 with system version UI: 2.0.5, Robot: 1.0.5
2.1 Network Configuration
The Locator SIASUN Module utilizes TCP/IP communication for transferring data between SIASUN Robot Controller and Vision Controller.
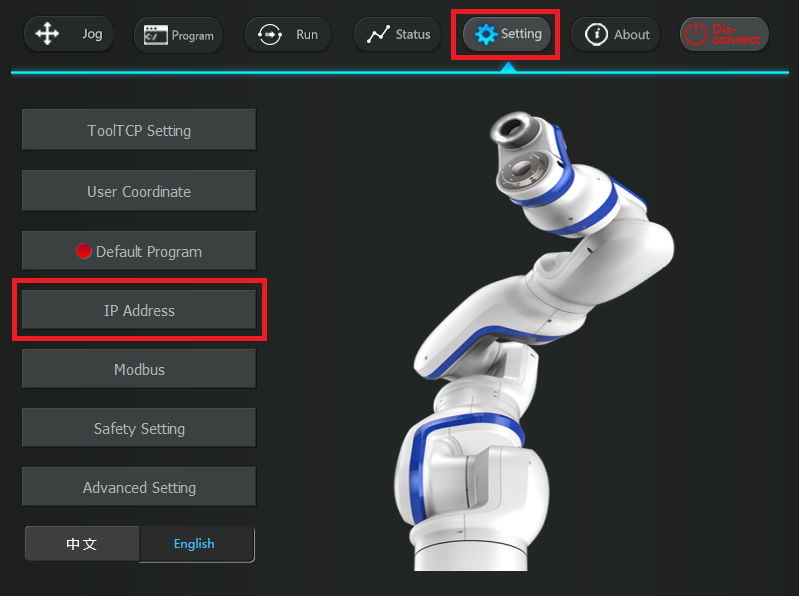
As a first step in commissioning, ensure that the IP address of the SIASUN controller meets your network configuration requirements
Browse to Settings -> IP Address:
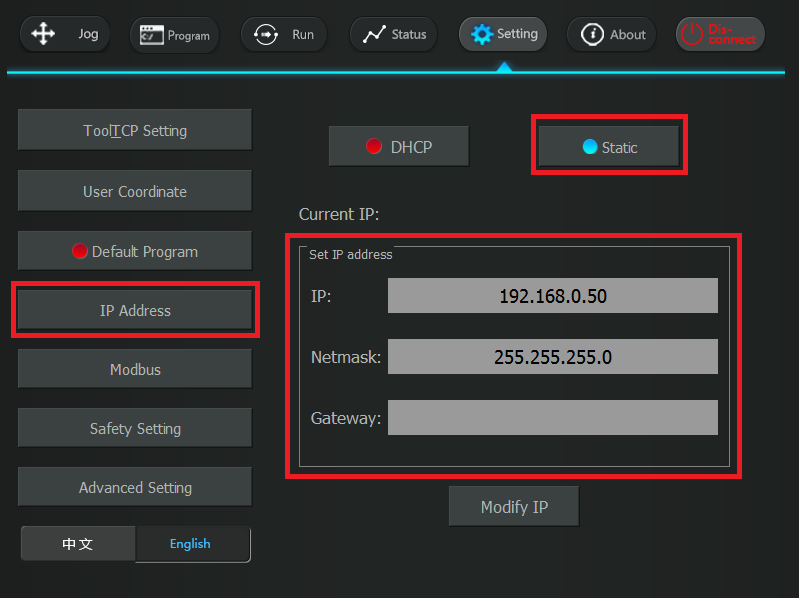
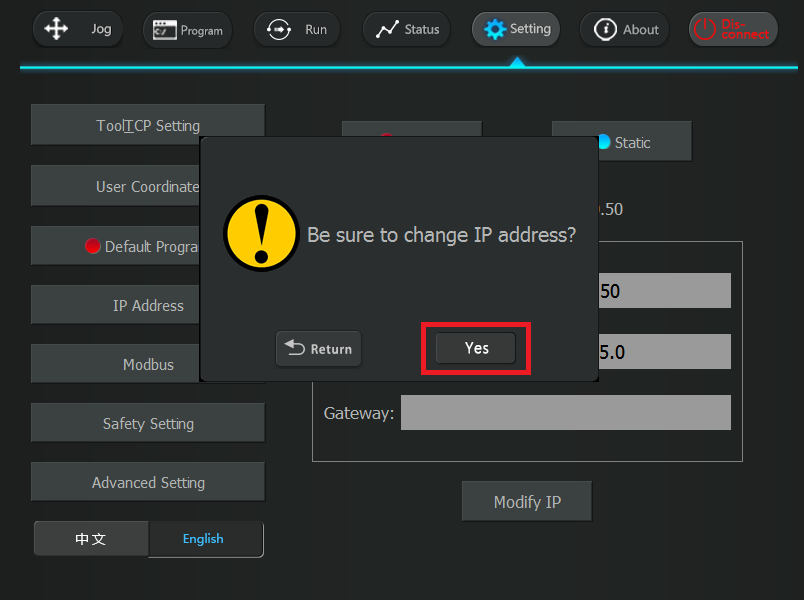
Select Static option and configure network settings of robot controller:
Confirm new network configuration by clicking on YES button:
The new network configuration is applied immediately, reboot is not necessary.
3. Photoneo SIASUN Module Setup
Photoneo SIASUN Locator Module is available in two variants:
- - Single Result Mode - only one localization result will be requested
- - Multiple Result Mode - user decides how many localization results within allowed range <1-16> will be requested
It is recommended to import both .spf to the robot controller and use more appropriate version accordingly.
Insert USB Stick containing Locator files to slot directly on the robot controller.
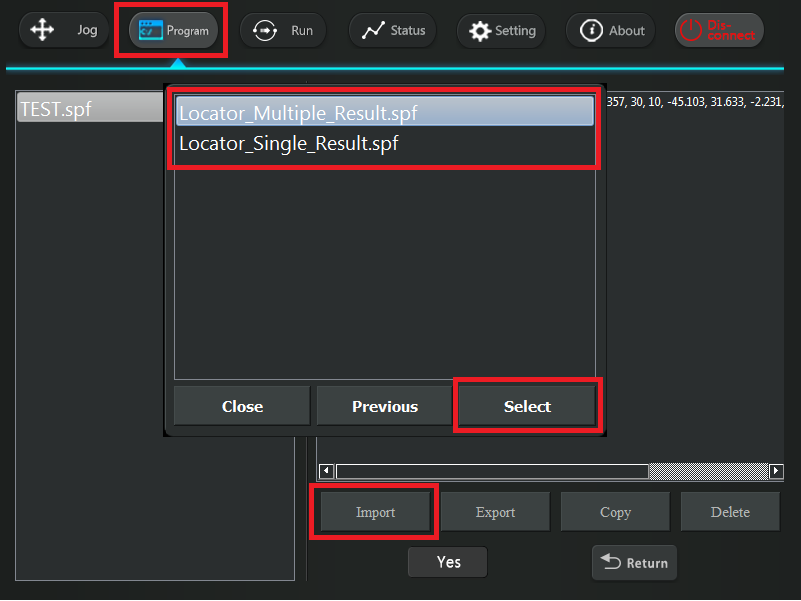
Select Program Tab -> Import -> Single/Multiple_Result_Mode and confirm by clicking the Import Button:
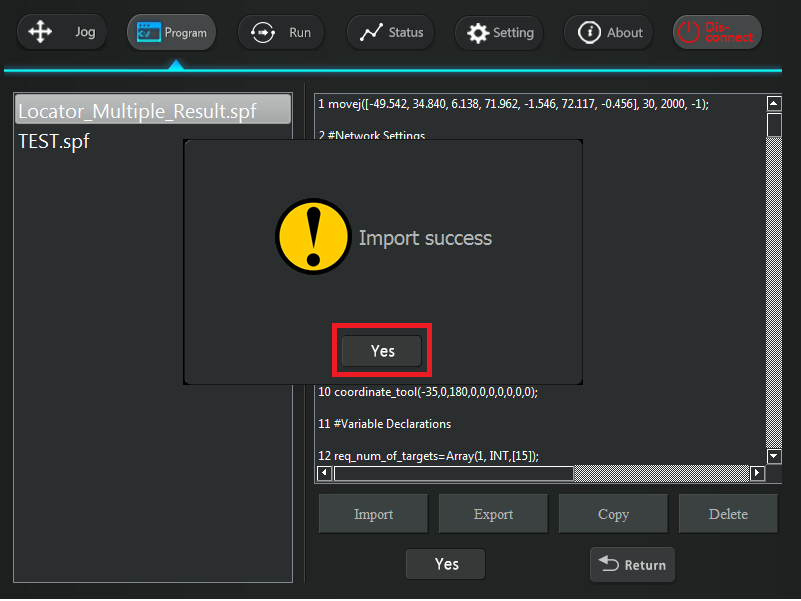
Successful import is confirmed by pop-up window:
4. Calibration
Robot Camera Calibration is a crucial step in Locator configuration. Accurate calibration guarantees that the object positions will be calculated directly in Robot Base coordinates.
4.1 Robot - Camera Calibration
Mount the Scanner firmly, ensure that the scene is properly captured from the final position and start the Photoneo Robot Camera Calibrator:
Connect to the Scanner, select XYZ_Extrinsic formalism (Standard for SIASUN robots), adjust the Sphere radius (20 mm in case of standard ping pong ball) and set the Min visible parameter to 40%:
