Locator Tutorial: Setting up Locator to work with ABB robots
Contents
1. Prerequisities
Locator ABB Interface is compatible with RobotWareOS versions 5.13 and higher.
The only system option required for this module is (616-6) PC Interface Module
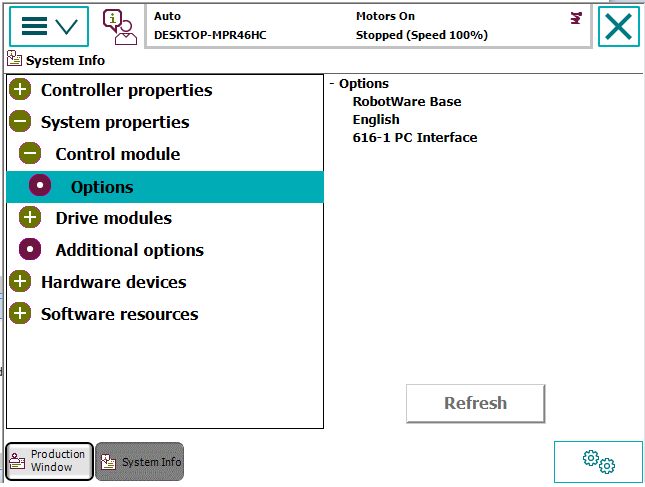
Using Pendant go to System Info -> System Properties -> Control Module -> Options to check if (616-6) PC Interface Module is available within your system:
NOTE: Use of Robot Studio v.6.06 or higher is highly recommended for Locator ABB Interface setup.
2. ABB Controller setup
The following tutorial gives a step by step guide of how to configure your ABB IRC5 controller and install all necessary RAPID files you will need to get the robot interface for Photoneo Locator up and running.
This tutorial was originally written using the latest RobotWare v.6.06, however it should be compatible with older versions with minor changes.
2.1 Network configuration
NOTE: The network configuration procedure described below only works with RobotWareOS v.6 or higher. If you have an older version of RobotWareOS and need to change an IP address, please contact local ABB support.
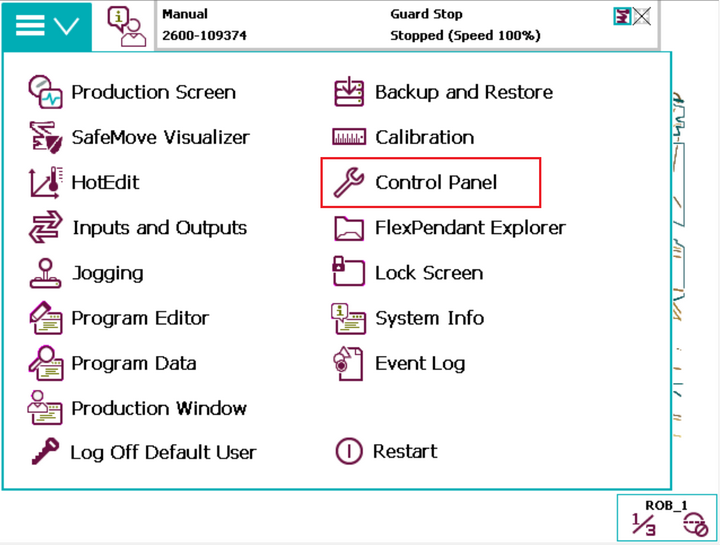
Turn on the IRC5 Controller, wait for the Initialization Screen to appear, open the Menu screen and select the Control Panel option:
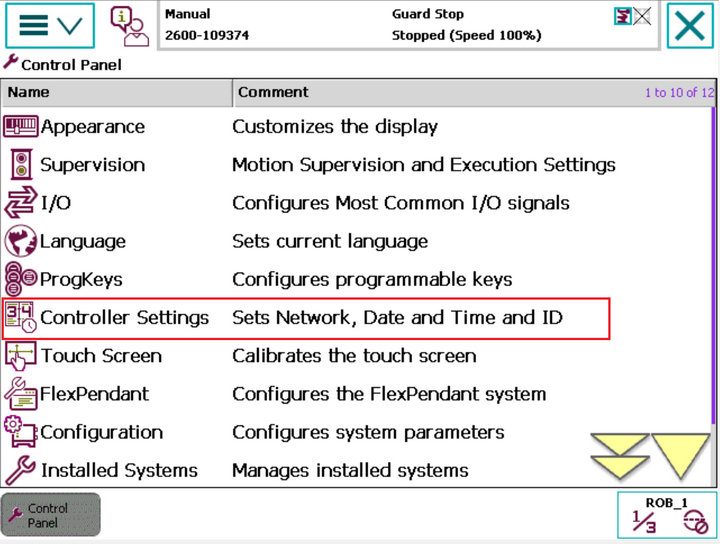
In the Control Panel pane, select Controller Settings:
Select Settings and choose the Network option:
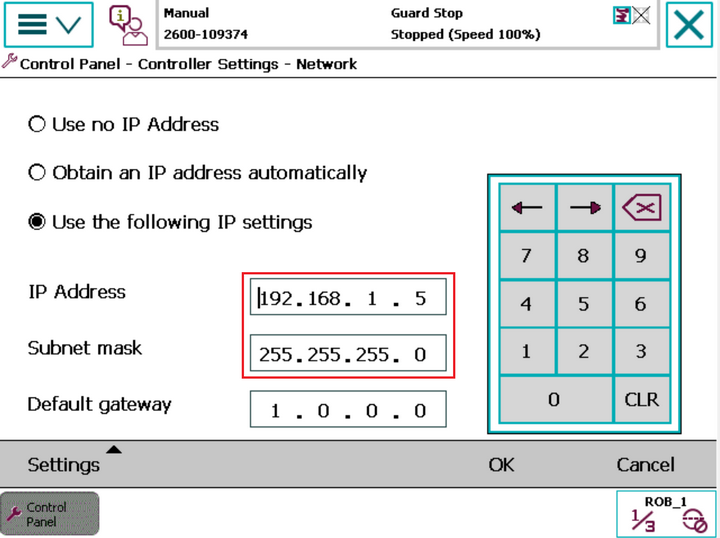
The Network Settings window should now appear. Use the Touch Panel Keypad to set the IP address of the IRC5 WAN port:
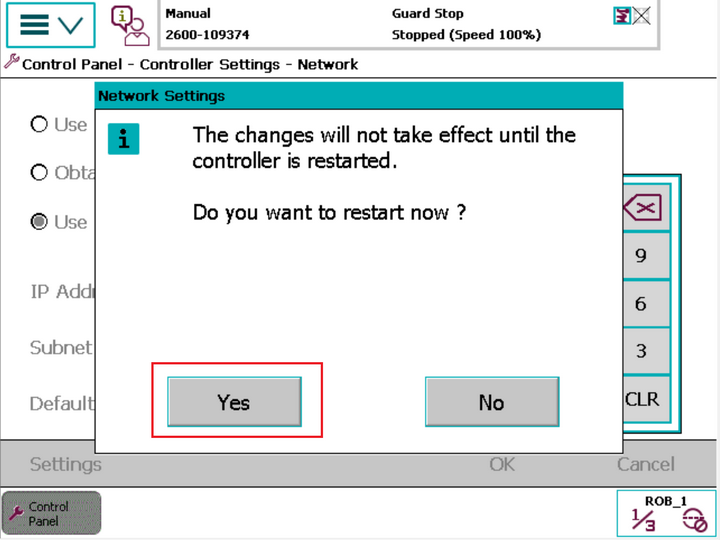
Choose OK button and restart the Controller to apply the new settings:
3 Robot Studio Setup
3.1 Connect to IRC5 Controller from Robot Studio
Set your local PC network settings to DHCP, plug an Ethernet cable into the Service Port of the IRC5 Controller and launch Robot Studio.
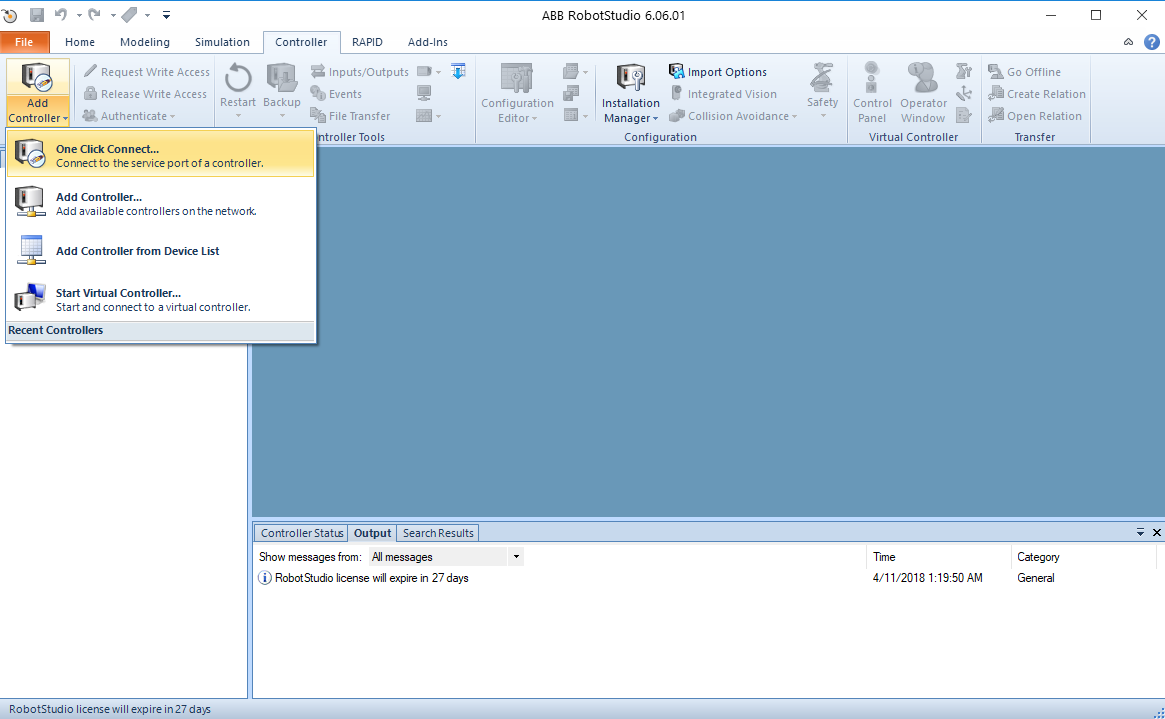
For a direct connection to the Robot Controller, select the Controller tab and select the One Click Connect option:
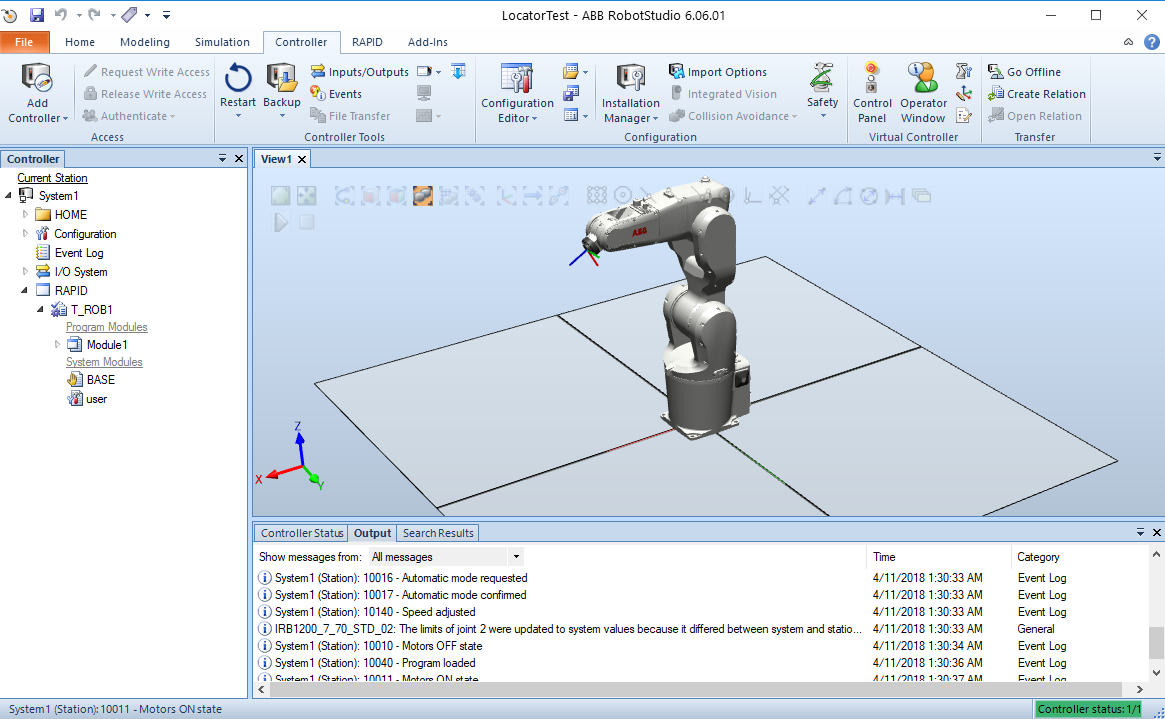
If everything is setup correctly, you should see the "Current Station" in the left panel.
NOTE: For the purpose of writing this tutorial an ABB IRB1200 7kg was used.
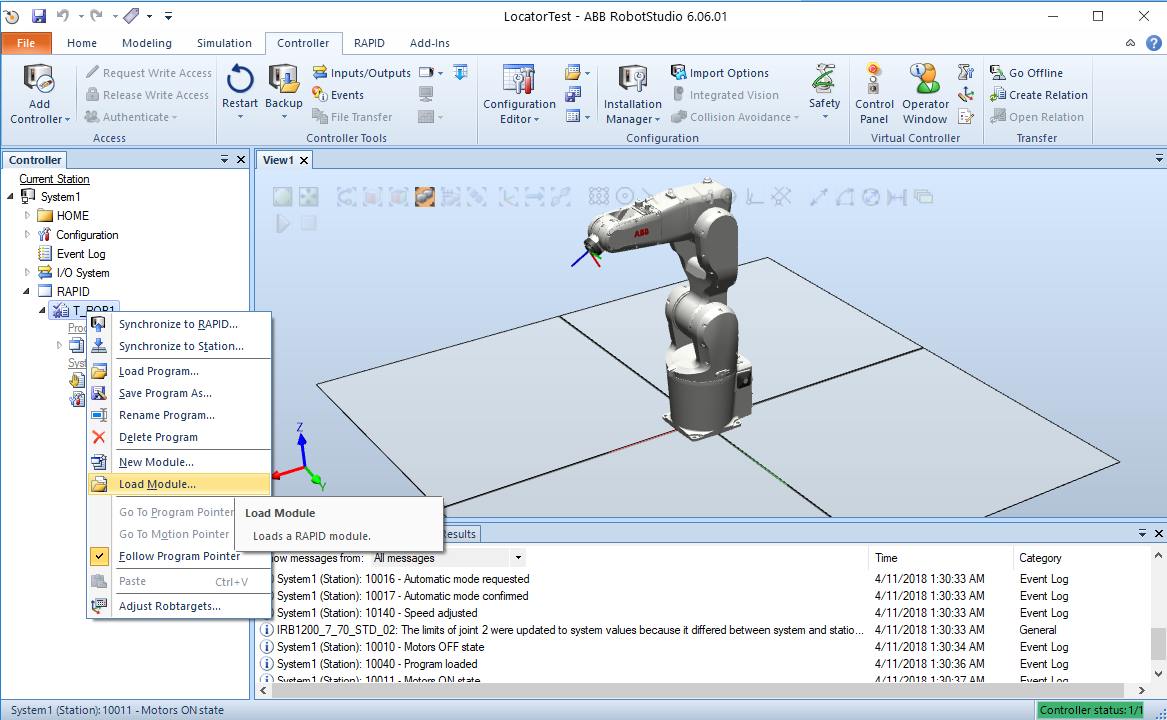
As a first step we need to upload PhotoneoLocatorModule to the controller. Right Click on T_ROB1 and select Load Module option.
You should see PhotoneoLocatorModule appear in the T_ROB1 module list.
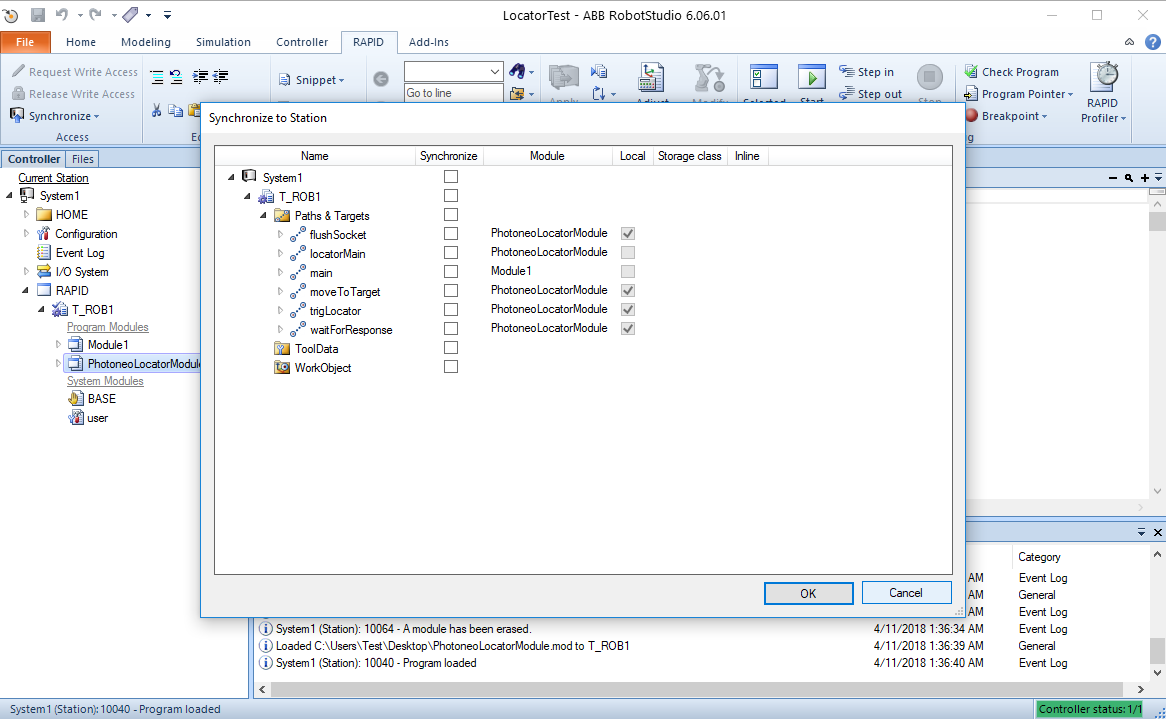
If Synchronize to Station dialog panel appears, just click Cancel, we will synchronize later.
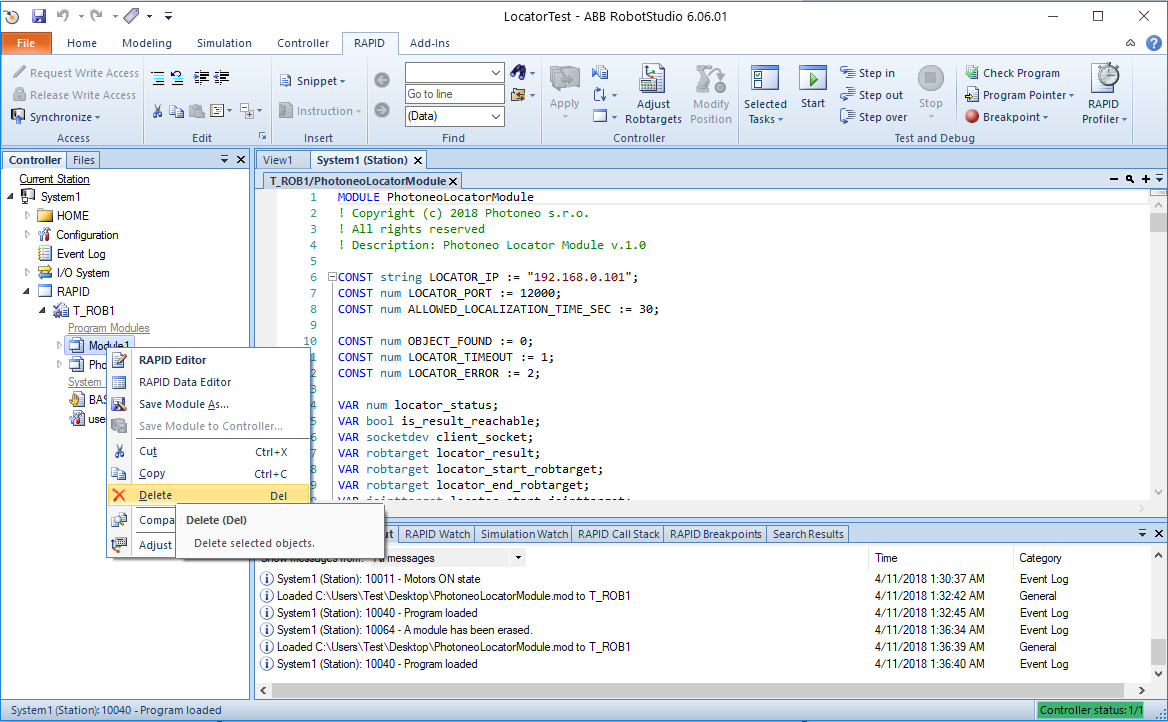
In case you are working with clean system and you do not plan to make use of default Module1 feel free to delete it.
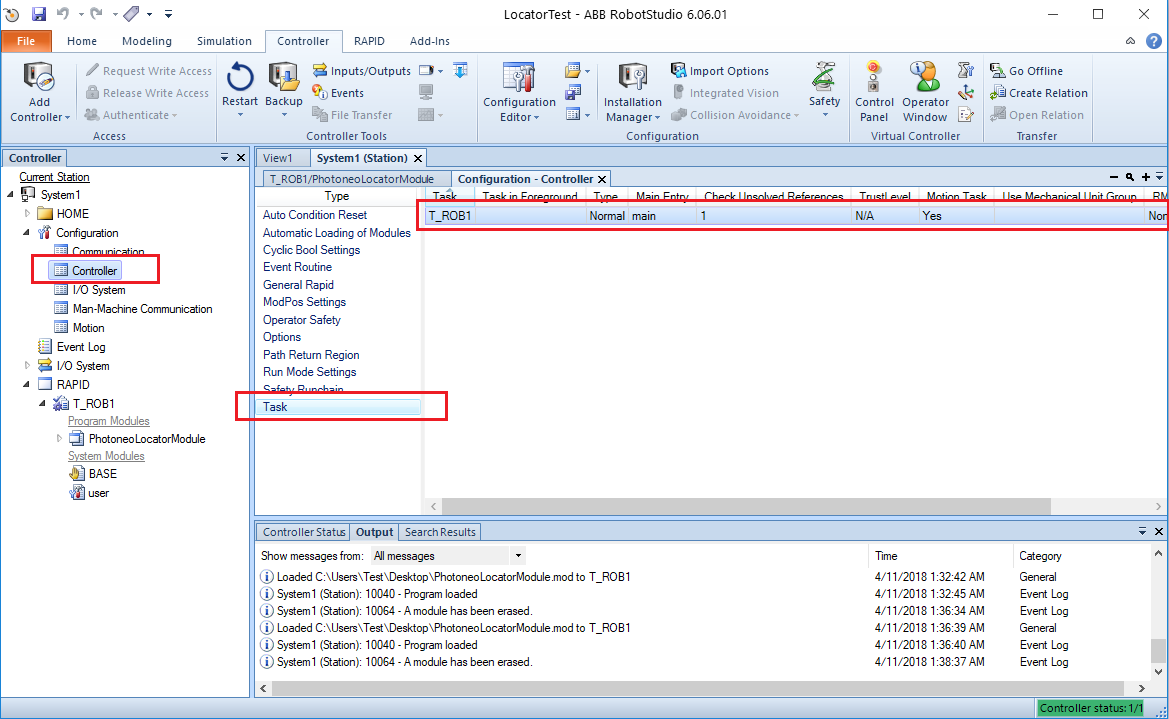
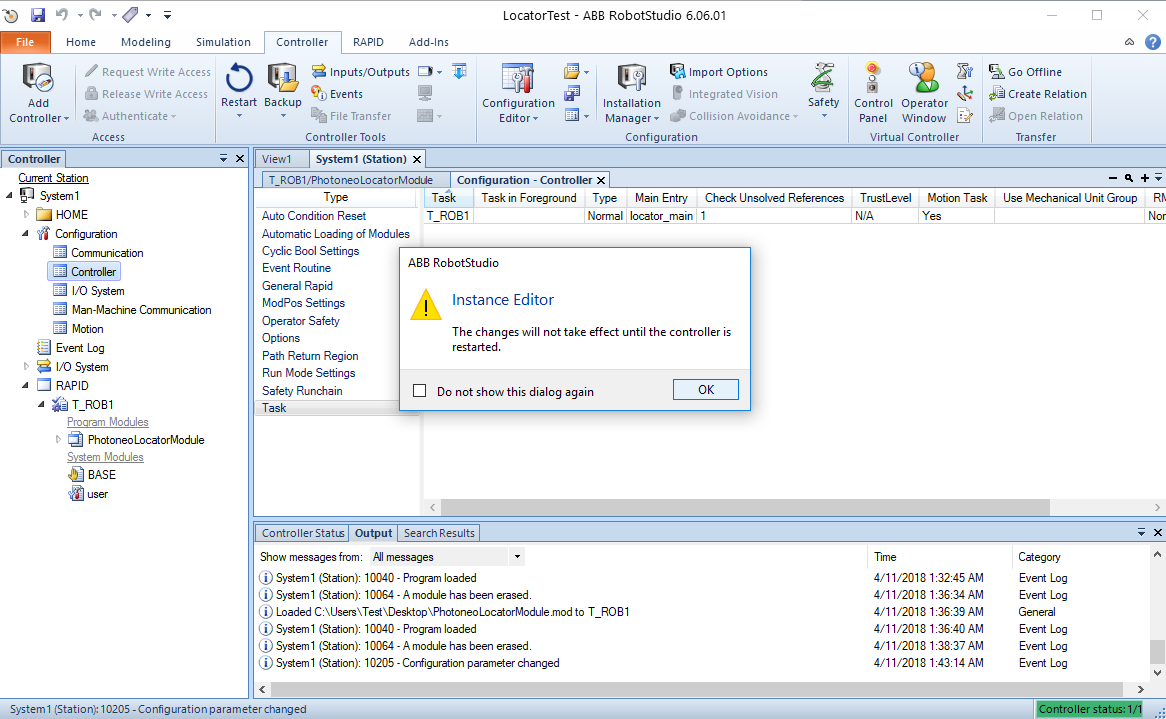
Now we need to set PhotoneoLocatorModule to become the main controller program. On the left pane, select Controller -> Configuration -> Task
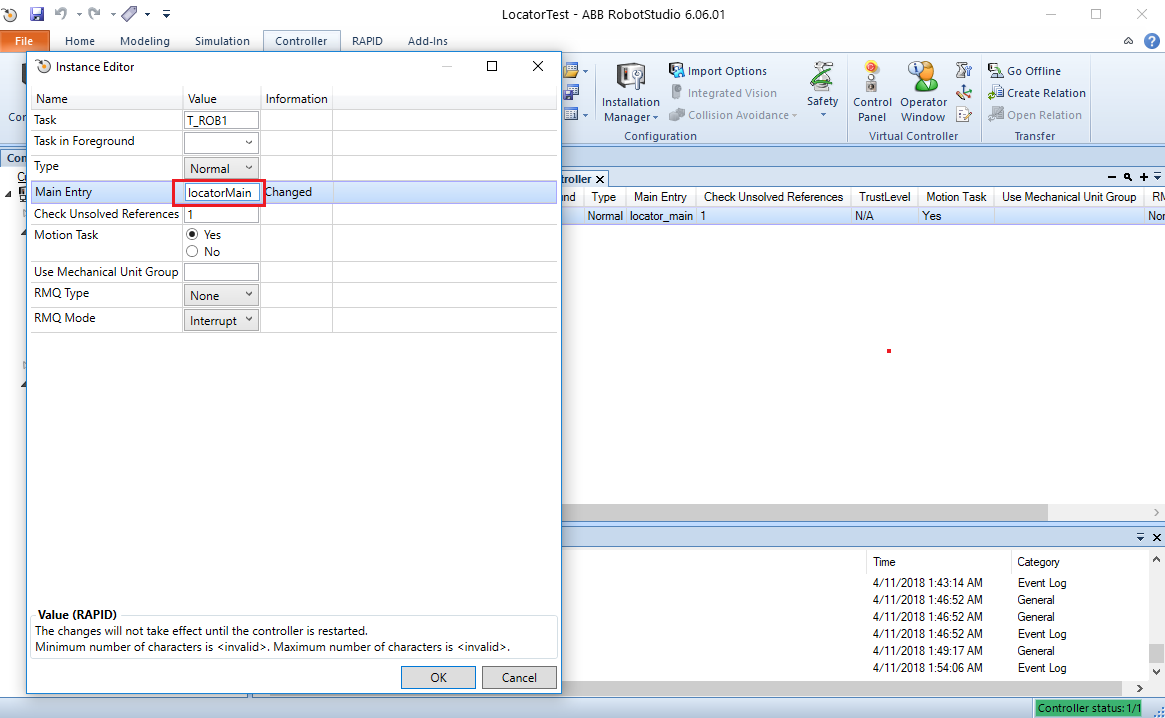
Now double click on T_ROB1 task. Instance Editor dialog screen should appear.
Here change Main Entry to Locator main fucntion which is called locatorMain and Hit OK.
Since this is a major change to the system, a restart is needed in order to take this effect. Hit OK here, we will restart system later on.
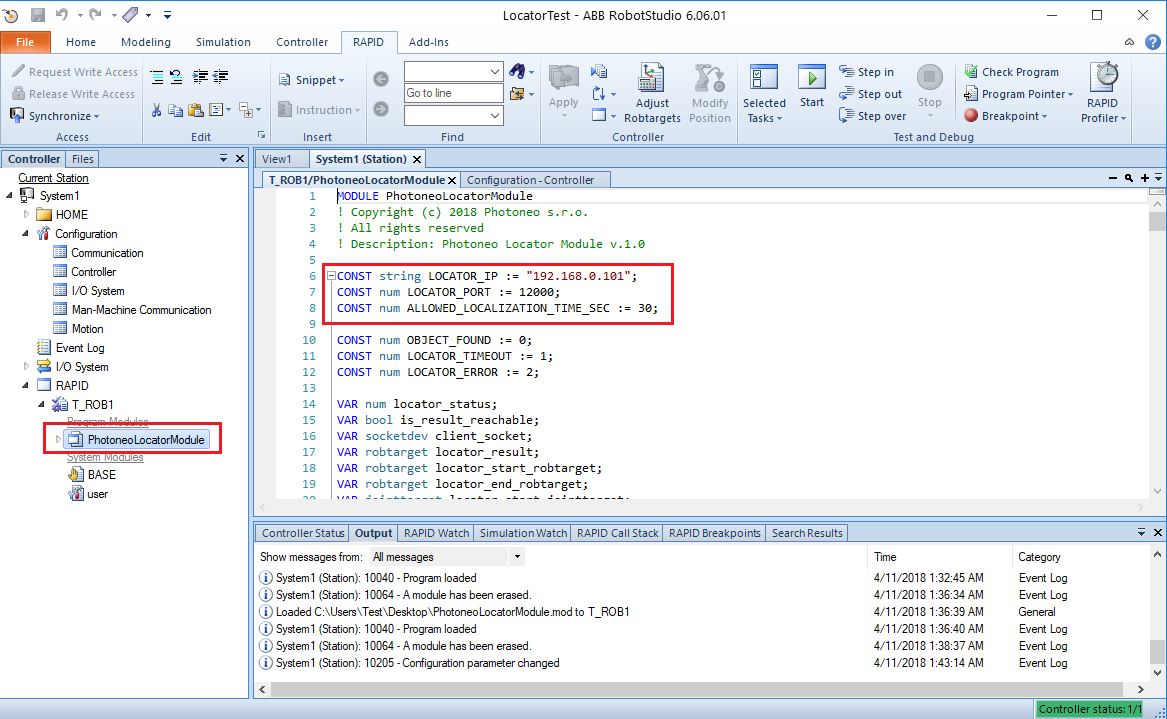
Now open PhotoneLocatorModule in the left pane to see the RAPID code. Adopt first three constants to meet your application requirements and network setup.
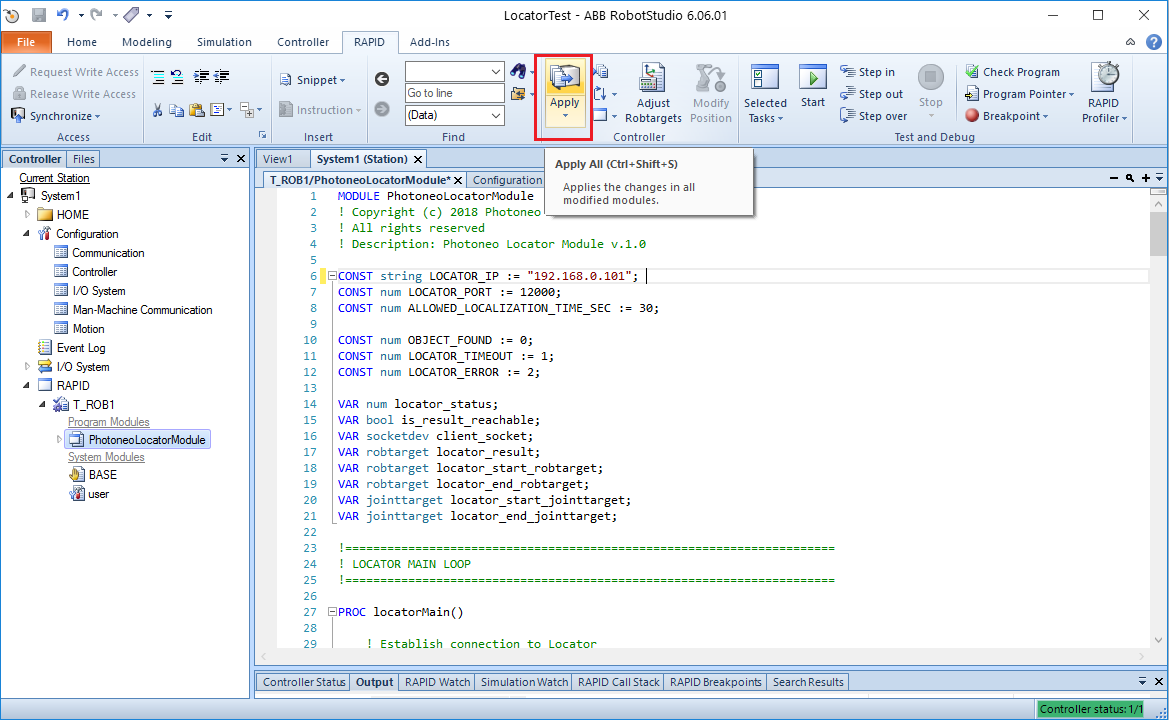
Click Apply button when finished
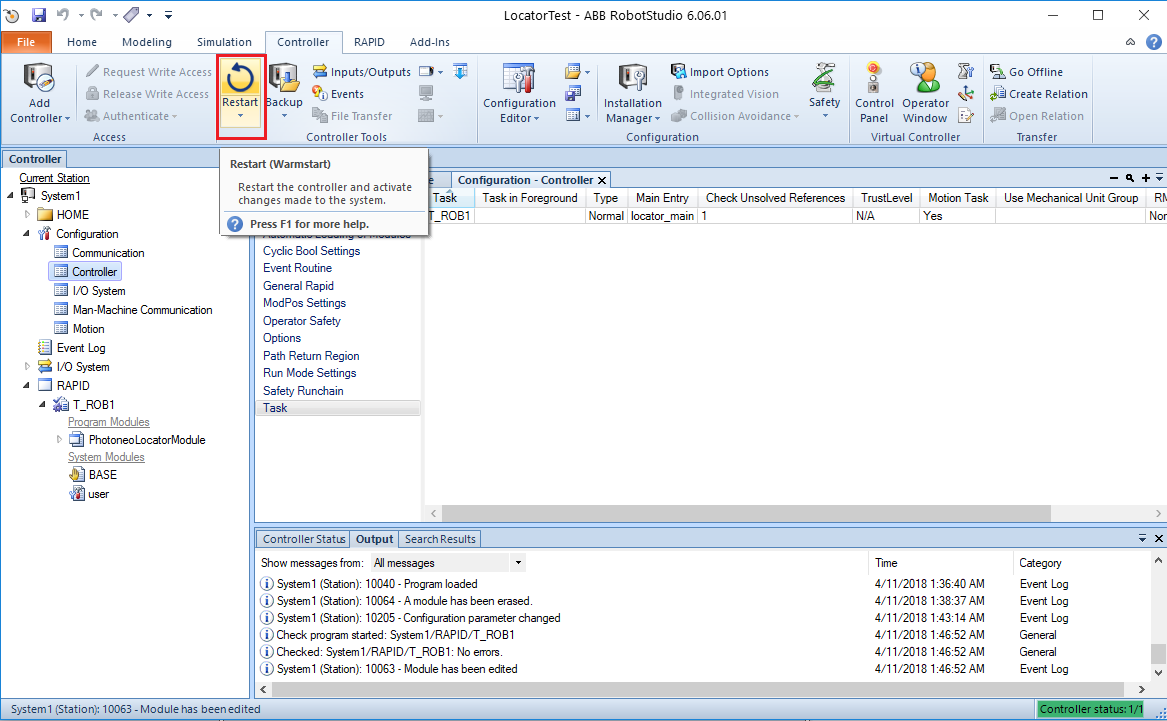
Now it is the time to Restart the system. Use Restart button in RobotStudio or directly on the Pendant.
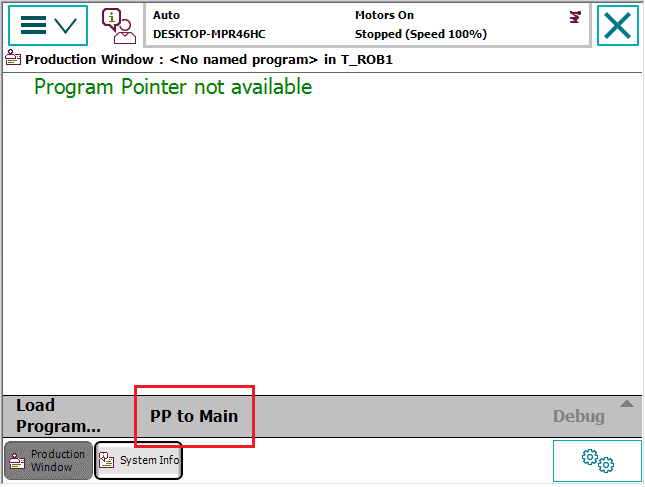
After restart open Production Window and hit PP to Main button.
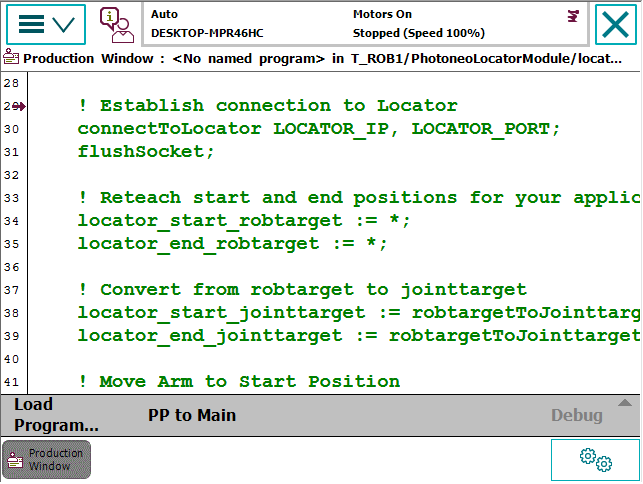
You should see the PhotoneoLocatorModule being properly loaded with the Program Pointer set as shown in the figure below:
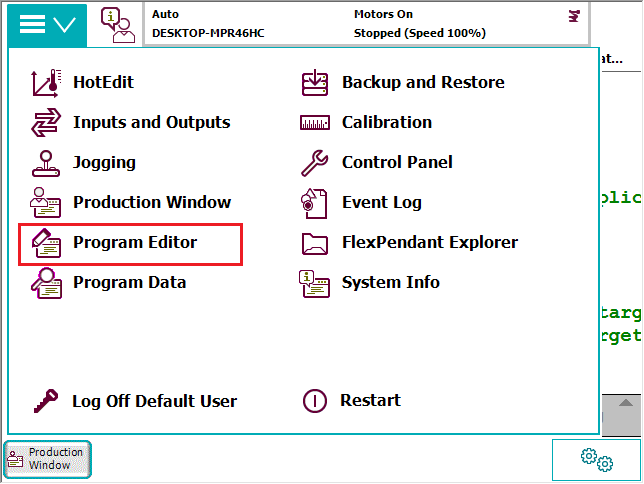
Before we can play the program we need to reteach Start and End positions to meet your robot and application requirements. From the Main menu select the Program Editor tool.
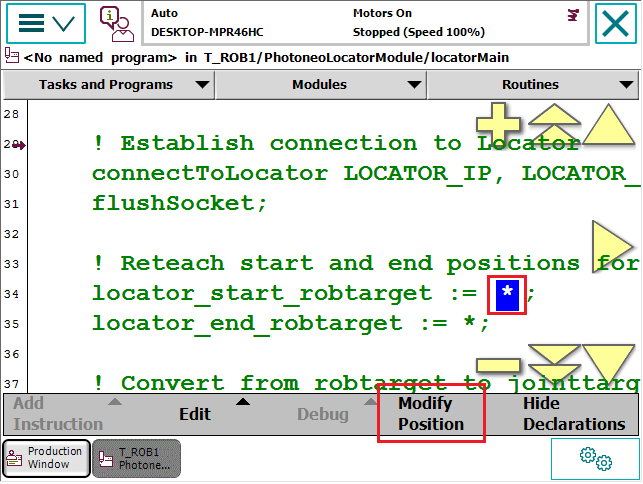
Switch to the Manual mode, jog the robot to your desired start position, select the asterisk at the locator_start_robtarget line and hit Modify Position.
Repeat the same procedure for locator end position
Now you are ready to run the program. Switch back to Auto mode, due to safety reasons select 10% speed, Production Window, PP to Main and hit Play.
Make sure that you are ready to stop the motion execution immediately in case if something goes wrong.
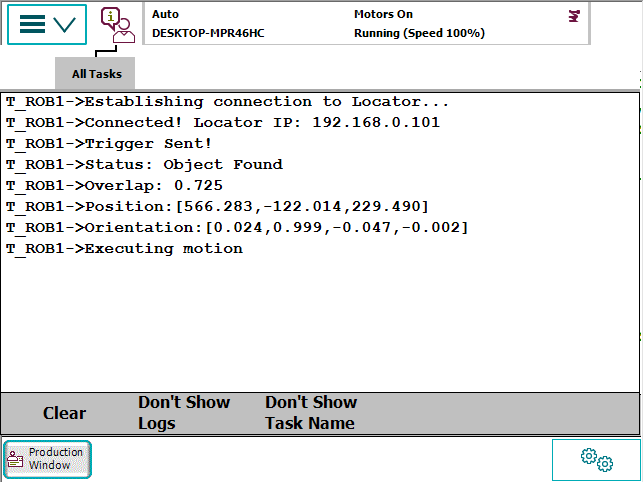
If everything works as expected you should see similar log output on the pendant screen.
