Difference between revisions of "Bin Picking Tutorial: Setting up Photoneo Bin Picking Studio with MITSUBISHI robots"
| Line 31: | Line 31: | ||
| − | Turn | + | Turn ON the Keyboard by pressing '''KEY''' at the bottom and type '''NETIP''' to the search box: |
| Line 37: | Line 37: | ||
| − | This parameter holds the current IP settings of the Robot Controller. Change IP Address here to match your network configuration (same subnet). | + | This parameter holds the current IP settings of the Robot Controller. '''Change IP Address here''' to match your network configuration (same subnet). |
| Line 43: | Line 43: | ||
| − | Confirm | + | Confirm '''WRITE''' and try to ping the Robot Controller from your PC. If this operation is successful, it should be possible to go Online from RTToolBox3. |
=== 2.2 Connect from RT ToolBox3 === | === 2.2 Connect from RT ToolBox3 === | ||
| + | |||
| + | When configuring the new project in RTToolBox it is recommended to enable TCP/IP communication for commissioning. | ||
| + | |||
| + | |||
| + | [[File: Setting Up Guide Mitsubishi RT Toolbox 1.png ]] | ||
| + | |||
| + | |||
| + | The default configuration should work with RTToolbox3. Do not change any parameters here unless you know exactly what you are doing: | ||
| + | |||
| + | |||
| + | [[File: Setting Up Guide Mitsubishi RT Toolbox 2.png]] | ||
| + | |||
| + | |||
| + | If project configuration has been completed, RTToolbox should be in Offline mode: | ||
| + | |||
[[File: Setting Up Guide Mitsubishi Step 0.png]] | [[File: Setting Up Guide Mitsubishi Step 0.png]] | ||
| + | |||
| + | |||
| + | Change to Online mode to start configuring Robot Controller: | ||
[[File: Setting Up Guide Mitsubishi Step 2.png]] | [[File: Setting Up Guide Mitsubishi Step 2.png]] | ||
| + | |||
| + | Photoneo Mitsubishi Interface consists of following .prg files: | ||
| + | |||
| + | * - '''PHOCLIENT''' - handles communication with BP Studio - Do Not Edit | ||
| + | |||
| + | * - '''PHOCOMMON''' - holds the definition of global variables | ||
| + | |||
| + | * - '''PHOMAIN''' - the main program loop is defined here amend program, poses, logic and gripper actions here | ||
| + | |||
| + | * - '''PHOSTATE''' - state server module, it runs in the background from the boot and keeps reporting joint states and TCP pose to the Bin Picking Studio. | ||
| + | |||
| + | As a first step in the Robot Controller configuration upload these four files to the Program List. Open Program Manager: | ||
[[File: Setting Up Guide Mitsubishi Step 3.png]] | [[File: Setting Up Guide Mitsubishi Step 3.png]] | ||
| + | |||
| + | |||
| + | Select four program files and copy them to the robot. Ensure that you have selected proper '''Source''' and '''Destination''': | ||
[[File: Setting Up Guide Mitsubishi Step 4.png]] | [[File: Setting Up Guide Mitsubishi Step 4.png]] | ||
| + | |||
| + | |||
Revision as of 09:11, 7 March 2019
NOTE: Users are strongly recommended to read the general introduction to robot interfaces prior to installing specific robot modules.
Contents
1. Prerequisites
Photoneo Mitsubishi Interface is written in MELFA V language and it it should be compatible with following controllers:
- - CR750D
- - CR800
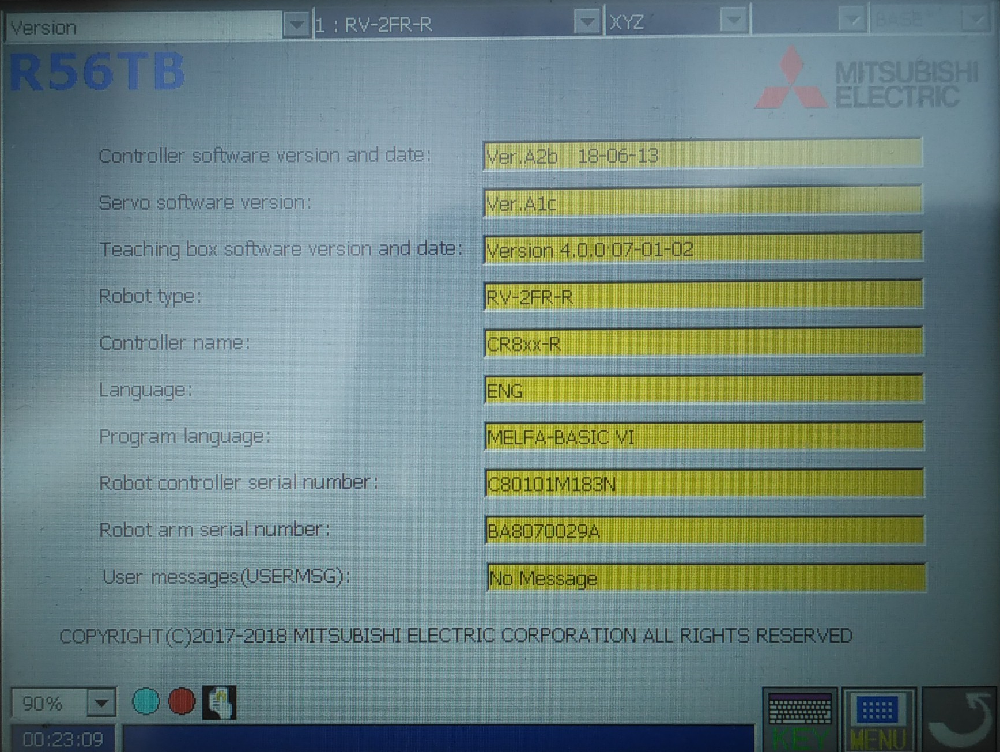
The robot used for the development: RV2-FR + CR800 controller with firmware version as shown in the figure below:
NOTE: RT Toolbox3 Software is highly recommended for setting up Photoneo Mitsubishi Module
2. Mitsubishi Controller Setup
2.1 Set IP Address
Setting up an IP Address of Robot Controller is an essential step in robot configuration.
It is not possible to go Online until the configuration of IP address does not match the network configuration of PC running RT Toolbox (same subnet)
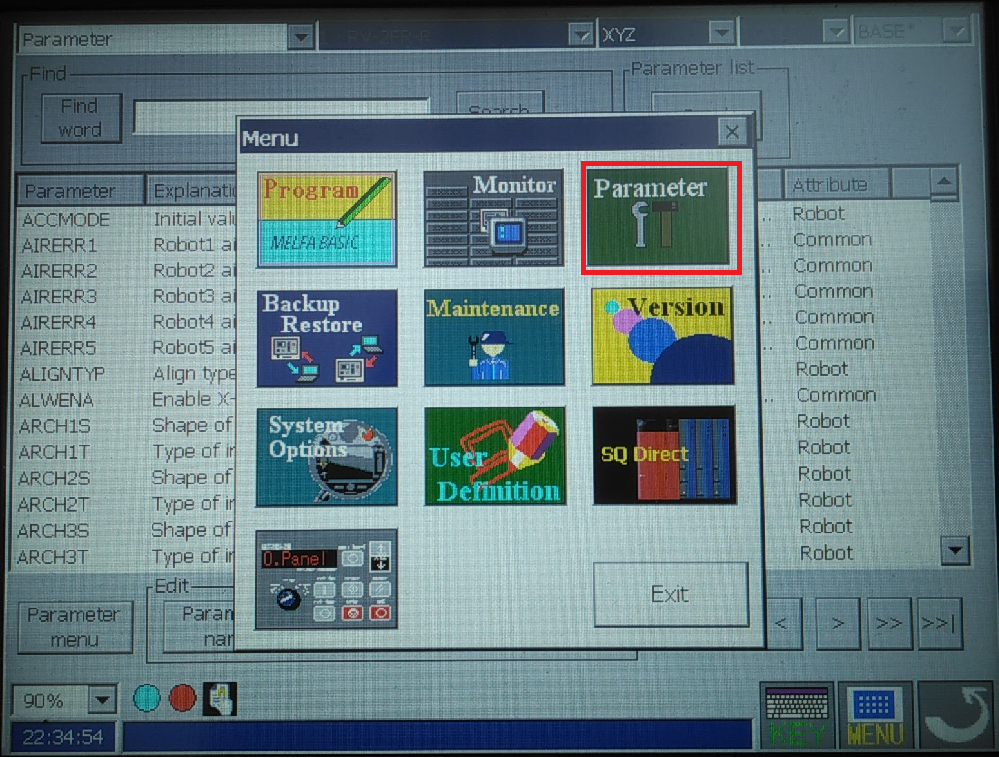
Turn on the Robot Controller and Click the MEMU at the bottom. Select Parameter to open the Parameter list:
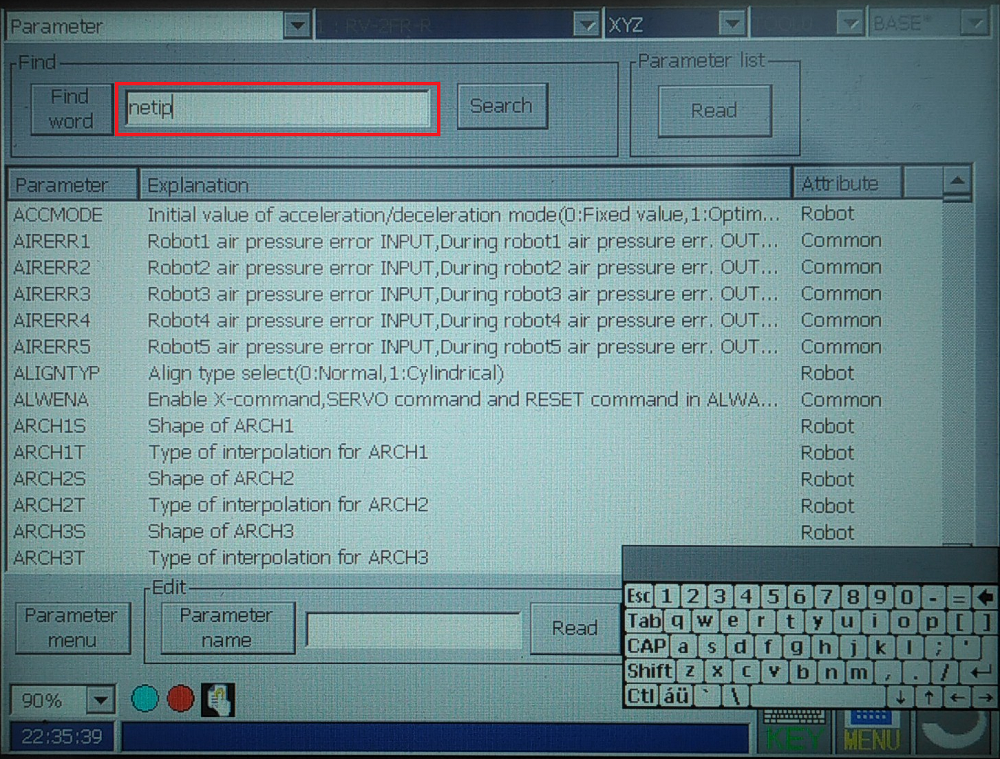
Turn ON the Keyboard by pressing KEY at the bottom and type NETIP to the search box:
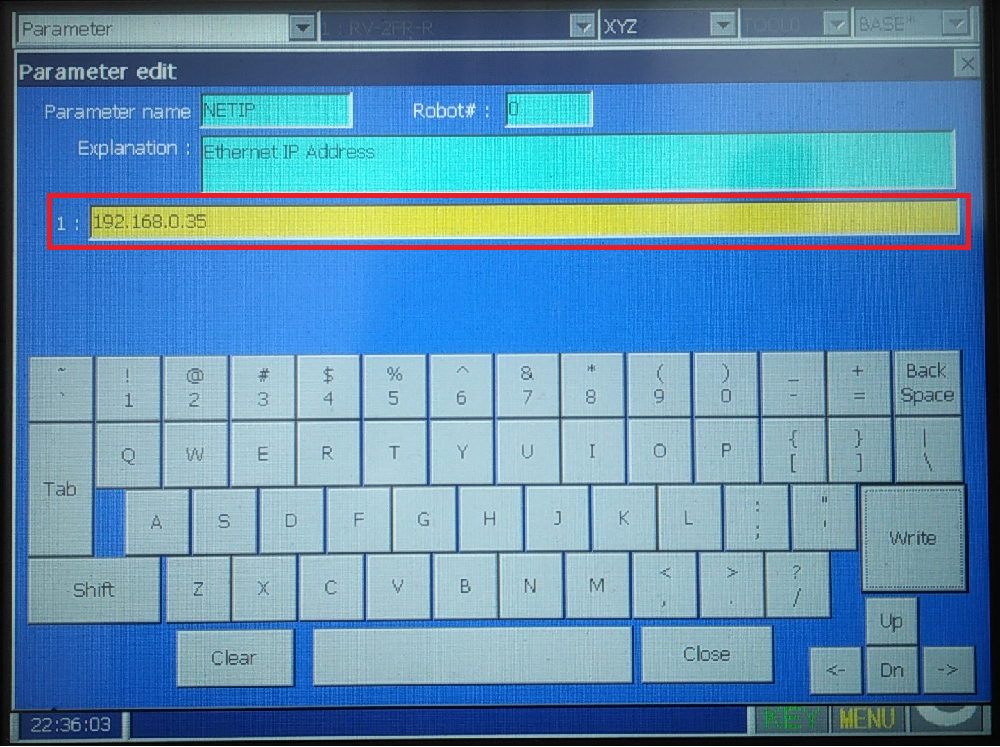
This parameter holds the current IP settings of the Robot Controller. Change IP Address here to match your network configuration (same subnet).
Confirm WRITE and try to ping the Robot Controller from your PC. If this operation is successful, it should be possible to go Online from RTToolBox3.
2.2 Connect from RT ToolBox3
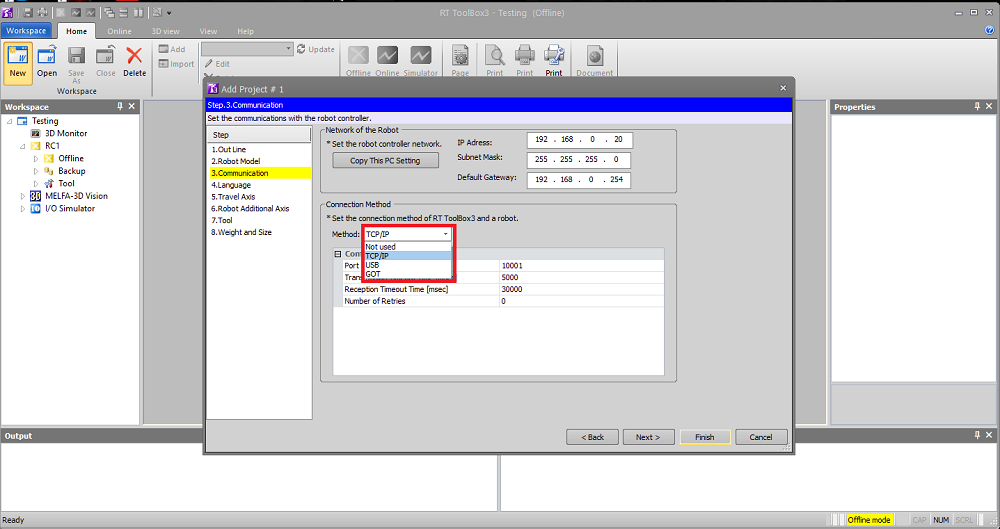
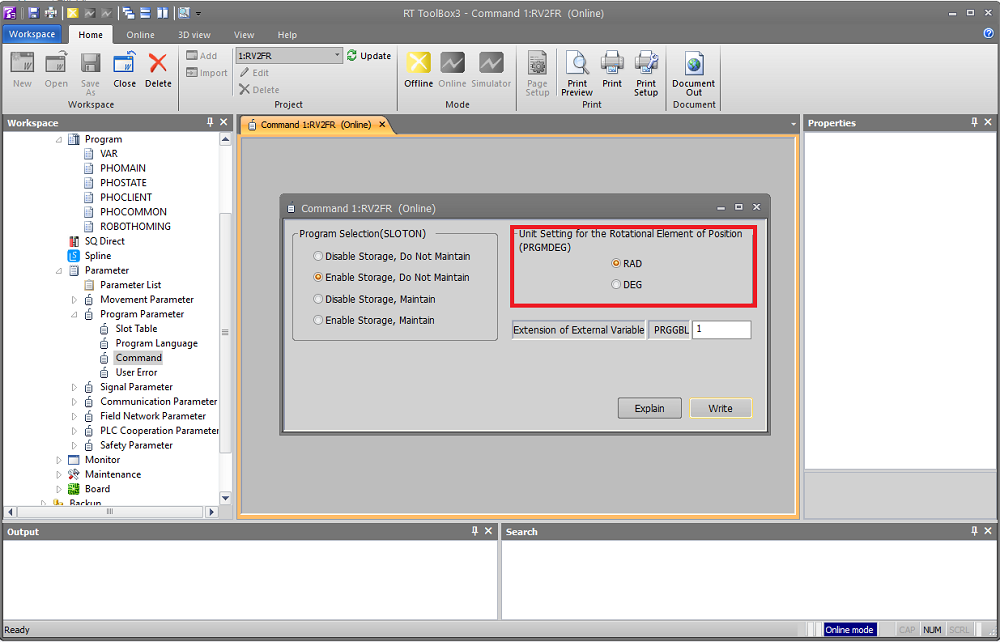
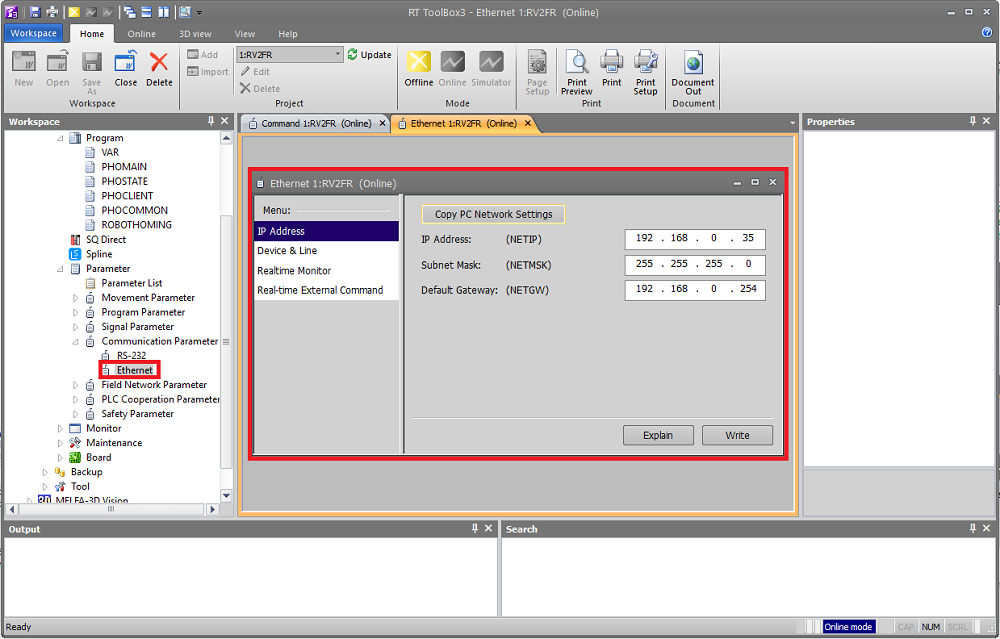
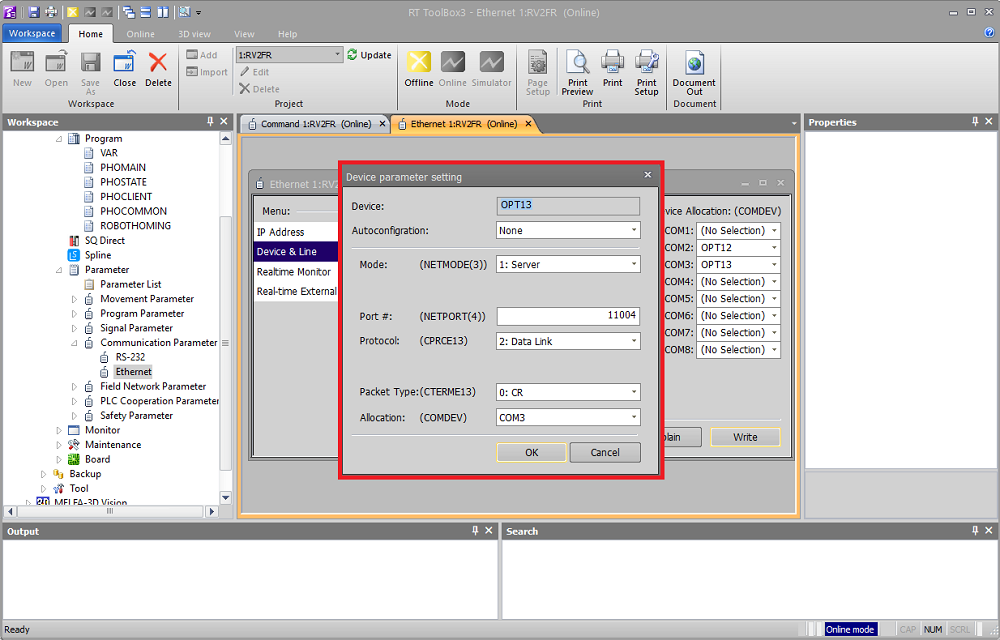
When configuring the new project in RTToolBox it is recommended to enable TCP/IP communication for commissioning.
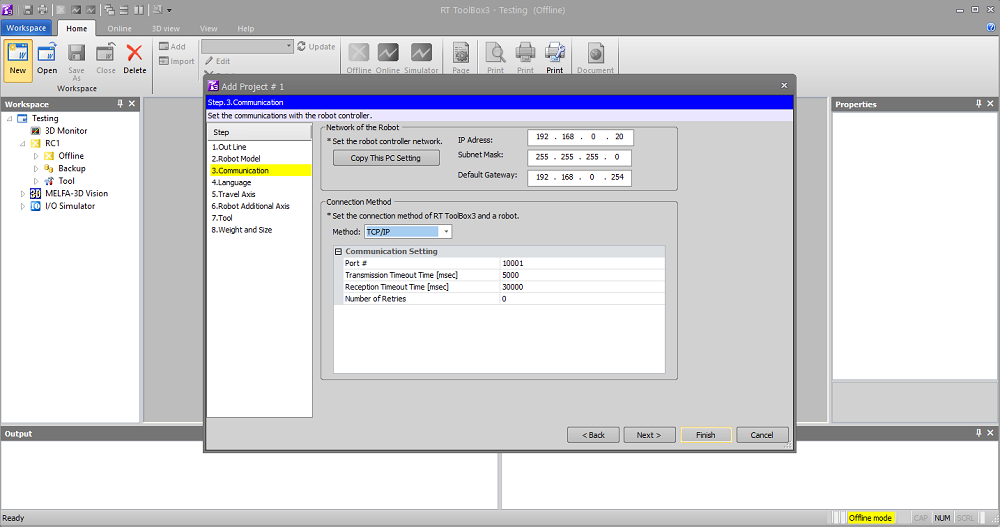
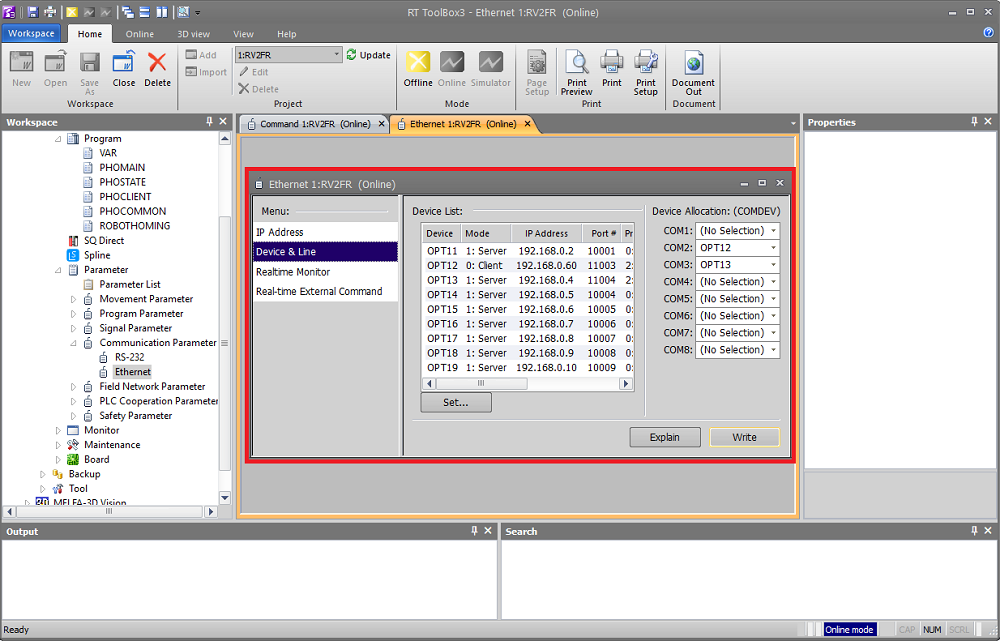
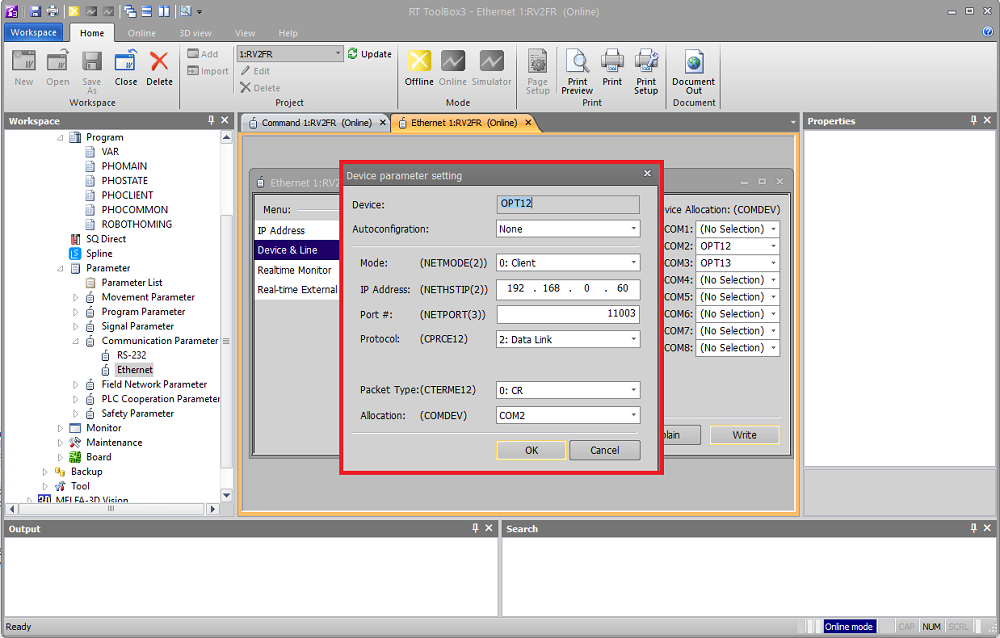
The default configuration should work with RTToolbox3. Do not change any parameters here unless you know exactly what you are doing:
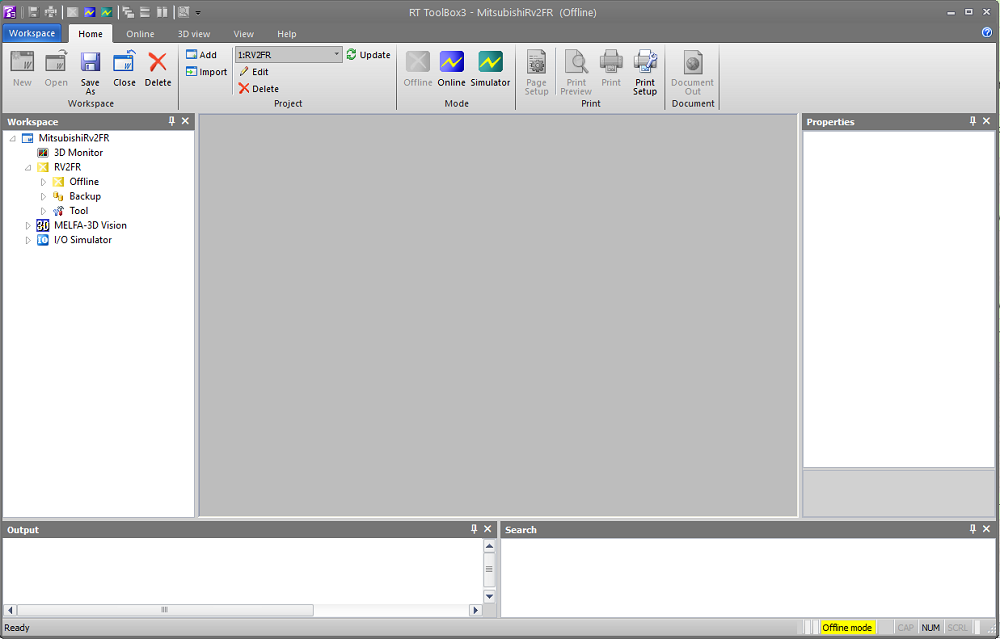
If project configuration has been completed, RTToolbox should be in Offline mode:
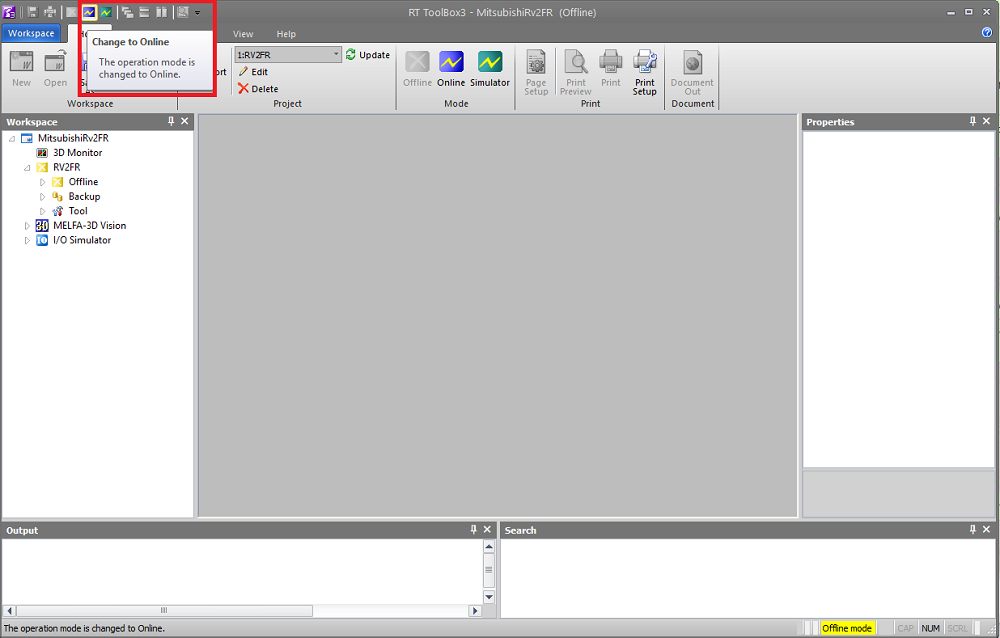
Change to Online mode to start configuring Robot Controller:
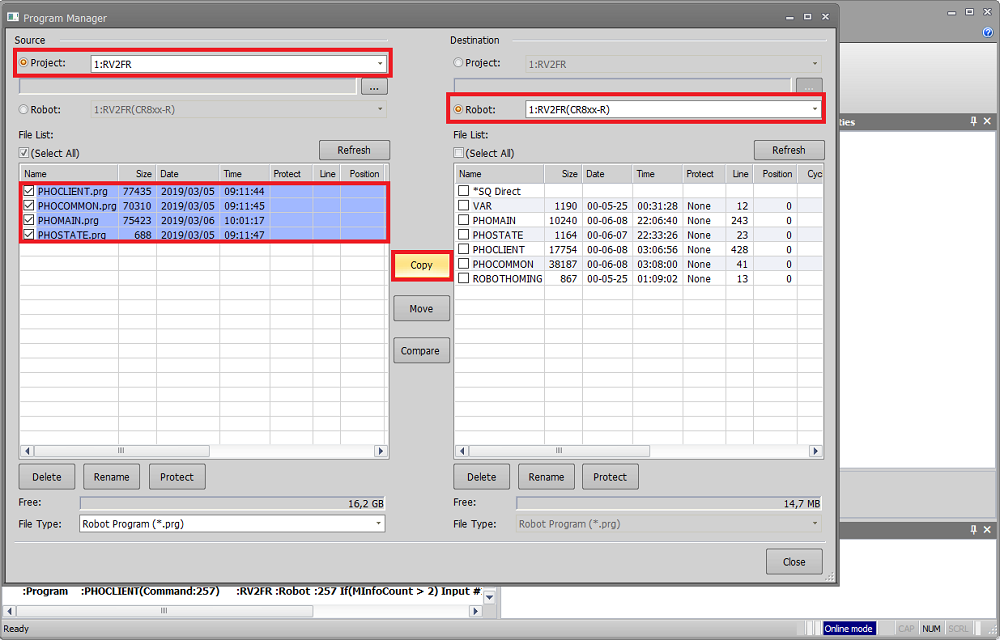
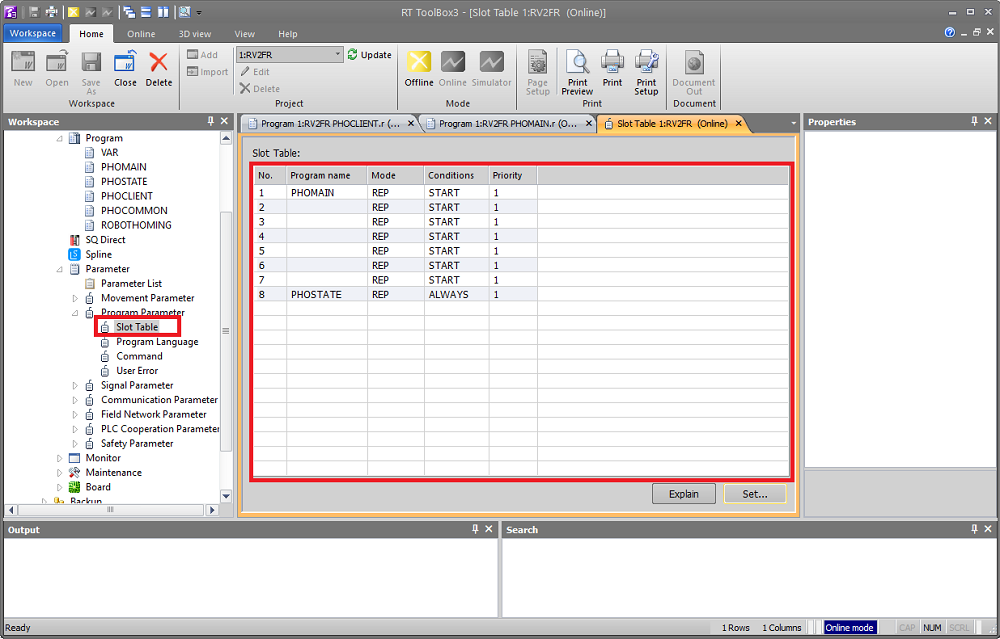
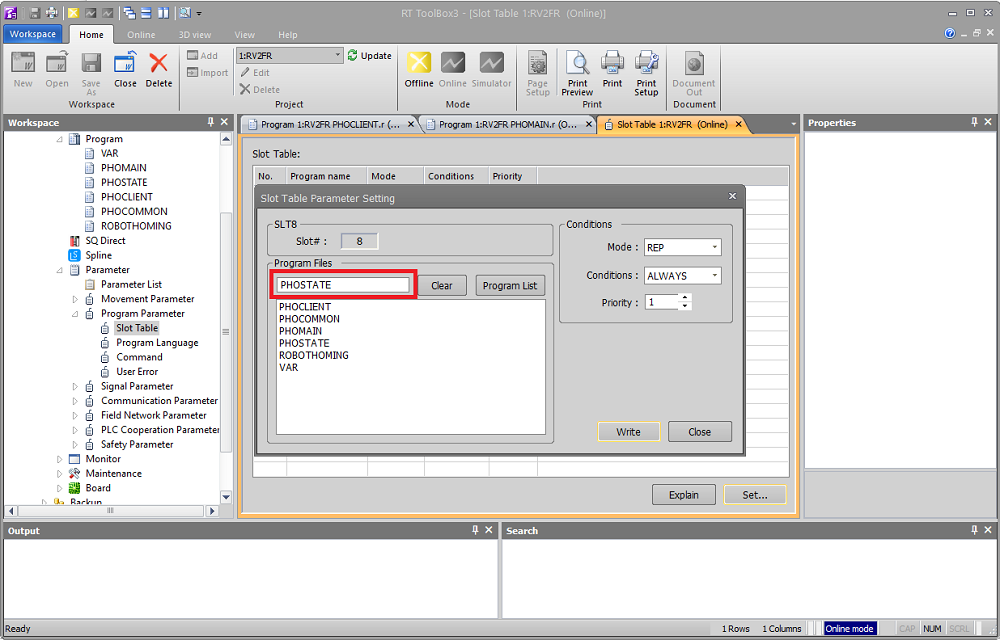
Photoneo Mitsubishi Interface consists of following .prg files:
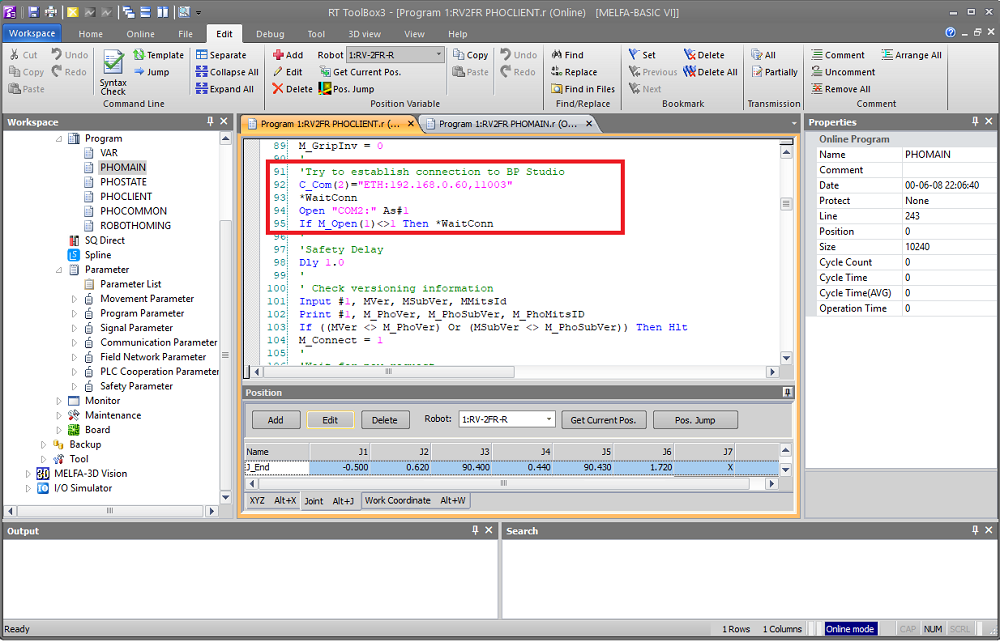
- - PHOCLIENT - handles communication with BP Studio - Do Not Edit
- - PHOCOMMON - holds the definition of global variables
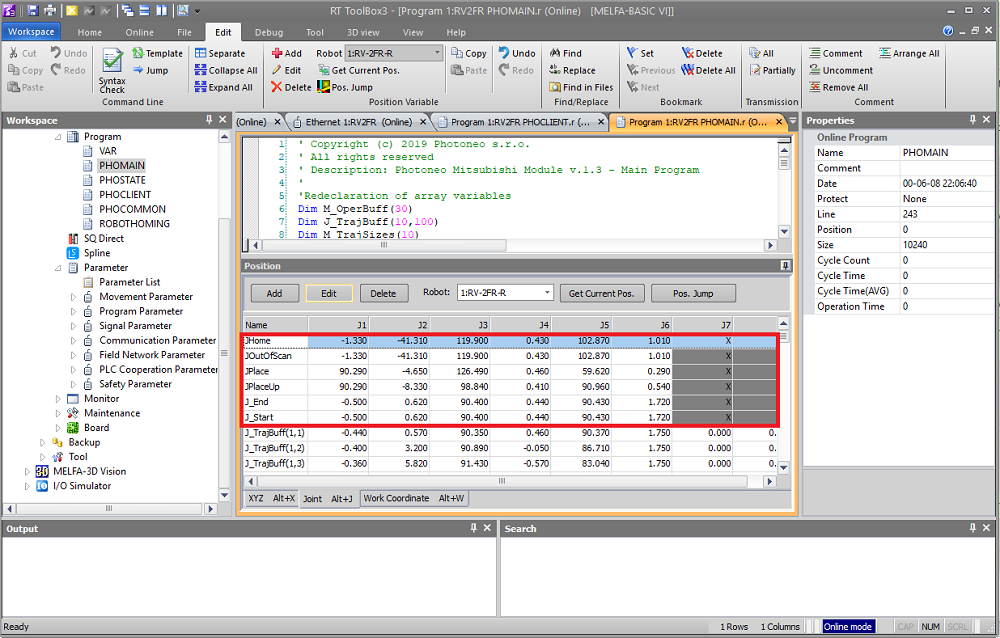
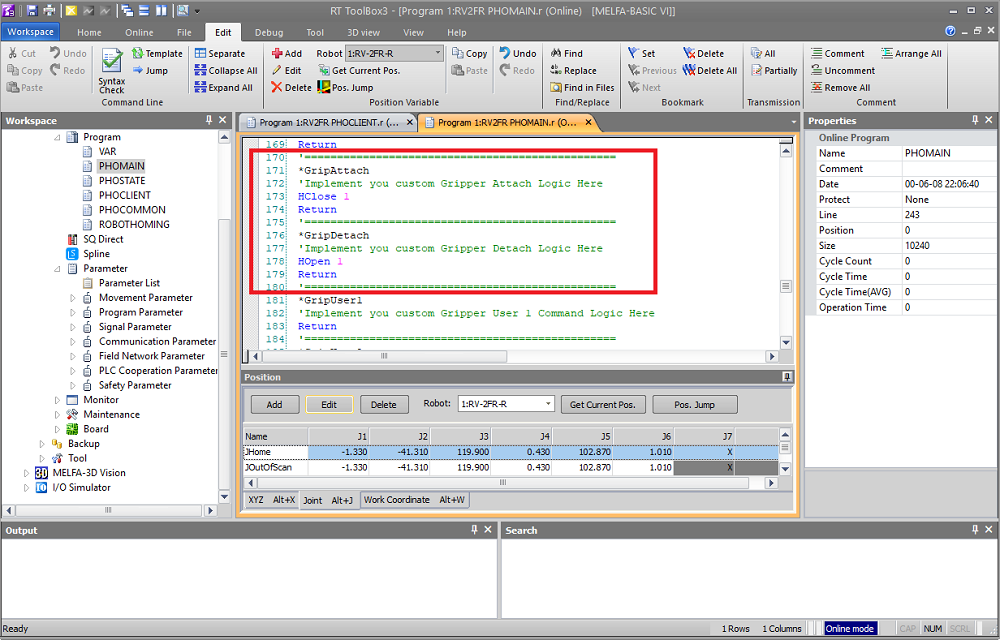
- - PHOMAIN - the main program loop is defined here amend program, poses, logic and gripper actions here
- - PHOSTATE - state server module, it runs in the background from the boot and keeps reporting joint states and TCP pose to the Bin Picking Studio.
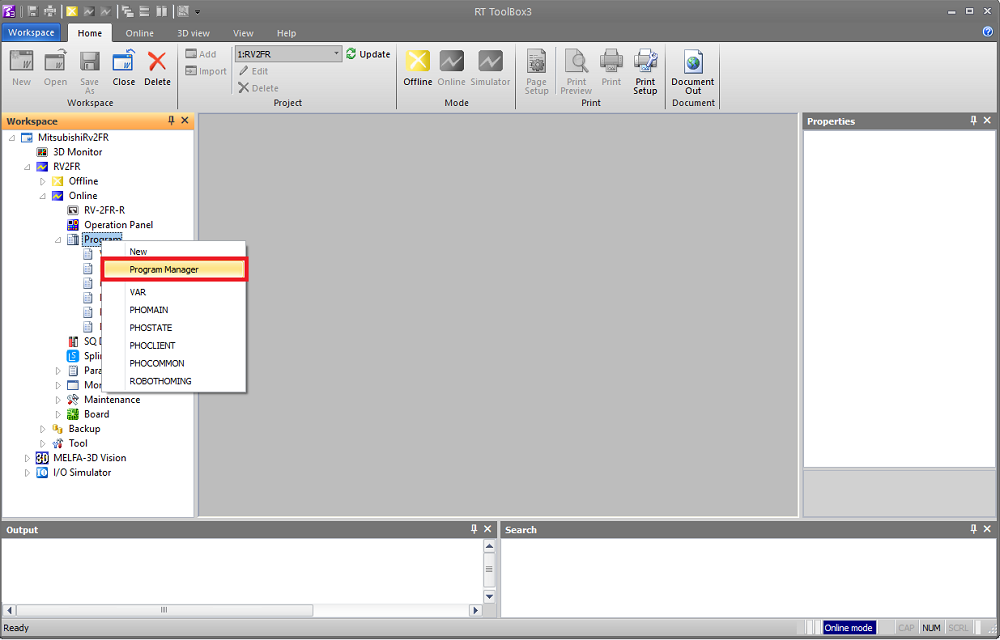
As a first step in the Robot Controller configuration upload these four files to the Program List. Open Program Manager:
Select four program files and copy them to the robot. Ensure that you have selected proper Source and Destination:
